
Restoring Exchange Server 2003
Documenting your Exchange Server 2003 Environment
To successfully restore or recover any aspect of your Exchange Server 2003 environment, it is important that you document the following:
- The Exchange Server 2003 environment.
- The backup process.
- The recovery process.
A well documented or complete Exchange Server 2003 environment document should include the following information:
- The Exchange server name.
- The Windows version and service pack running on your servers.
- The Exchange version and service pack running on your servers.
- The Exchange organization name.
- Site names.
- Database names and sizes.
- Database locations.
- Storage group names.
- Public folder name.
- Public folder replication process.
- Global Catalog server names.
- Global Catalog server locations.
- Configured administrative rights.
- All security delegations.
Recovering from Site Failures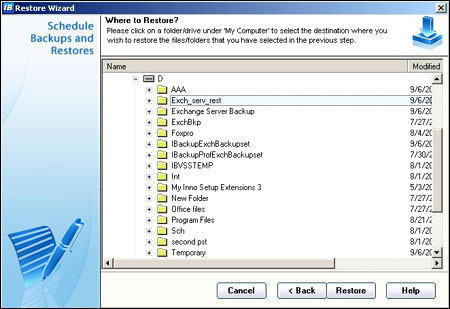
To recover an Exchange server in a site which becomes unavailable, you have to create redundant sites. A redundant site can have a secondary Internet connection and bridgehead routing server configured. Then, when the primary site becomes unavailable, the secondary site would continue to provide email communication.
A few recommendations for creating site redundancy or a failover site are listed here:
- You should use the appropriate hardware devices. The servers should have sufficient disk space and processing capabilities.
- You should create one copy of backup tape medium for each site, at a minimum. Backup copies should be stored offsite as well.
- Ensure that recovery documentation is stored offsite as well.
- You should also have redundant DNS servers registered for the domain. DNS servers should be located at each physical location.
When failing over between sites, you have to ensure that all Exchange server dependencies are also failed over so that they can be failed back when you need to perform a restore. This includes:
- DNS servers.
- Domain controllers.
- Global Catalog servers.
Recovering from Boot Failures
There may be occasions when a Windows Server 2003 system that has a service/application start-up issue could result in the server not completing a normal bootup sequence. This basically means that the Windows operating system is unavailable while the issue persists.
To assist administrators in restoring a server to a state where it can be accessed, Windows Server 2003 includes a few alternative bootup options.
The Windows Server 2003 advanced boot options are:
- Safe Mode: When you are experiencing difficulty starting the computer, you can use the Safe Mode advanced boot option to start Windows with the minimal or basic files and drivers needed for the computer to start. Safe mode is therefore useful to sort out driver problems. To select Safe mode, press F8 when prompted to choose the OS to start. The advanced options for booting Windows are displayed next. When the computer starts in Safe mode, the background screen is black. Safe mode is displayed in each corner of the screen.
- Safe Mode With Networking: This advanced boot mode starts the computer in Safe mode but includes support for networking.
- Safe Mode With Command Prompt: If you select the Safe Mode With Command Prompt advanced boot option, Windows starts in safe mode with networking but with a command-prompt window displaying.
- Enable Boot Logging: This mode creates a log file, Ntbtlog.txt, which details the drivers and services which loaded/failed during the boot process. The mode can be used if you need to find out what is causing the system to fail. Ntbtlog.txt is located in the %WinDir% folder.
- Enable VGA Mode: This mode is typically used when you need to change the screen resolution to one that is supported, or when a bad display driver was installed, because it starts Windows with the standard VGA driver.
- Last Known Good Configuration: This mode utilizes registry information from the last time Windows was shut down to start Windows. Any changes that was made after the last time Windows started is lost when you use the Last Known Good Configuration mode.
- Directory Service Restore Mode: Windows is started in safe mode with networking when the Directory Service Restore Mode is selected. Directory Service Restore Mode also restores the SYSVOL and Active Directory directory service on the domain controller.
- Debugging Mode: Windows is started with debug information being transmitted to a different computer through a serial cable connection.
- Recovery Console: This Windows advanced boot option boots to the Recovery Console command line if the Recovery console is installed.
You can either use the Default configuration or the LastKnownGood configuration to start a Windows based computer. The Default configuration contains configuration data that is saved when the computer shuts down. The LastKnownGood configuration contains configuration information that is saved when a successful logon occurs. When you execute any configuration changes, they are recorded in the current control set. The kernel copies the information in this control set to the clone control set when the computer reboots. After a successful log on to Windows, the information in the clone control set is copied to the LastKnownGood control set.
The last known good process can be used to recover the configuration when a driver is problematic, and you cannot reboot. The process uses the LastKnownGood control set to boot Windows. You would typically use the Last Known Good Configuration Option in the Advanced Options Menu when you install a device driver, and the system fails to respond after you restart Windows; or when you unintentionally disable a critical device driver.
How to install the Recovery Console:
- Place your Windows installation CD in the CD-ROM drive.
- Open a command session/window.
- Navigate to the I386 directory or folder on the CD.
- Proceed to run winnt32 /cmdcons.
- A Window next opens that contains a Recovery Console warning message.
- Click Yes to install the Recovery Console. When you install the Recovery Console, the cmdcons folder is created in the root directory. You are actually booting to the Windows installation CD when you boot via the files in the cmdcons folder. The Partition Boot Sector is also copied from the Windows system volume to the cmdcons folder. The file it is copied to is Bootsect.dat. The Recovery Console installation process also places Cmldr at the root of the boot partition. Cmldr is an alternative bootstrap loader. The Boot.ini file is also changed to contain the alternative for booting to the Recovery Console.
- A Successful Completion message is displayed after the recovery console files are installed.
How to run the Recovery Console:
- Place the Windows Installation CD-ROM in the CD-ROM drive, and proceed to restart the computer.
- Press Enter when the Setup program shows the Setup Notification message.
- Press R to repair your existing Windows installation.
- To start the Recovery Console, press C.
- If applicable, select the installation that should be repaired.
- Insert 1, and then press Enter.
- When asked to provide the Administrator password, type it, and then press Enter.
- You can enter the help command to view the available command options.
- After you have completed with the repair, enter the exit command. Press Enter.
- The exit command exits the console, and also restarts the computer.
How to use the Last Known Good Configuration Option.
- Shut down and restart the computer.
- Press F8 when prompted to select the OS to start.
- The Advanced Options Menu screen is displayed.
- Choose the Last Known Good Configuration option on this screen.
How to boot using the emergency repair disk :
You would typically use the emergency repair disk when you cannot boot using one of the advanced boot options.
To boot using the emergency repair disk:
- Boot from the Windows Installation CD-ROM or from the Windows setup disks.
- Press R to repair your Windows installation.
- Press R to use the emergency repair process to repair your Windows installation.
- Press F to use the Fast Repair option. Fast Repair automatically repairs system files, the boot sector, and registry and startup problems.
Recovering Active Directory
When it comes to restoring Windows Server 2003 Active Directory, you can use one of the following restore methods:
Normal Restore: In Windows 2000, this was your Non-Authoritative restore method. A Normal restore functions pretty much the same as a Non-Authoritative restore. With a Normal restore, the Backup utility is run on the computer while in Directory Services Restore Mode. After the domain controller is rebooted, normal replication occurs with replication partners.
A normal restore is typically performed when the following conditions exist:
-
- A domain has multiple domain controllers, and only one domain controller is operational. You can use a Normal restore to restore all other domain controllers in the domain.
- A domain has a single domain controller, and that domain controller has to be restored. You can also choose to alternatively perform a Primary restore of Active Directory.
- Authoritative Restore: An Authoritative restore of Active Directory has to be performed in cases where a Normal restore would not be able to return Active Directory to the correct state. For instance, if an organizational unit was deleted in error, a Normal restore would only result in the particular OU being deleted once again, after replication. This is basically due to the replication partners having a higher version number for the particular OU. An Authoritative restore has a similar process to that of a Normal restore, the difference being that after system data is restored, you define certain Active Directory objects as being authoritative. When Active Directory objects are defined as authoritative, the particular objects have the higher version numbers. This results in these objects being replicated to the other domain controllers copies of the Active Directory database.
- Primary Restore: The Primary restore method is used when each domain controller within a domain hosting multiple domain controllers, needs to be restored. What this means is that the entire domain has to be reconstructed from the Active Directory backup. This method can also be used to restore Active Directory for a domain that only has one domain controller. The Primary restore method is selected in Windows Srver 2003 Backup utility by merely enabling the Primary restore method checkbox. This removes previous complexities associated with performing this type of restore in Windows 2000. The Primary restore process is also very similar to that performed for a Normal restore of Active Directory.
How to restore the Active Directory database to a single domain controller:
- Reboot the computer.
- During startup, press F8 when prompted to, and then select Directory Services Restore Mode (Windows DCs only) from the Windows Advanced Options menu. Press Enter.
- Choose the operating system that should be started. Press Enter.
- When the Safe Mode logon prompt appears, enter the appropriate local administrator account information, and then click OK.
- Click OK when a message appears, advising that Windows is running in Safe Mode.
- Click Start, All Programs, Accessories, System Tools, and then click Backup.
- On the initial page of the Backup or Restore Wizard, click Next.
- Ensure that the Restore files and settings option is selected on the Backup Or Restore page. Click Next.
- On the What to Restore page, choose the backup which you want to use for the restore process. Click Next.
- Click Finish to immediately start a normal restore of Active Directory. If you want to configure advanced option settings, click Advanced, and not the Finish button.
- When the Where to Restore page appears, choose one of the following options from the Restore files to list box:
- Original location, this default setting restores files to their original locations.
- Alternate location, if selected, you can specify a different location to which the files should be restored.
- Single folder; this option restores files to a single directory.
Click Next.
- Click OK if a message is displayed, warning you that a restore of system state data overwrites existing system state data.
- When the How to Restore page opens, choose between the following options:
- Leave existing files (Recommended); select this option if you do not want the restore to overwrite any existing files.
- Replace existing files if they are older than the backup files; if selected, files older than the backup files are replaced.
- Replace existing files; this option replaces all existing files with the backup files.
Click Next.
- When the Advanced Restore Options page is displayed, you can select the following options:
- Restore security settings; is enabled by default. If you disable this checkbox, all files would be restored without any permissions.
- Restore junction points, but not the folders and file data they reference; when selected, the restore process is able to restore information on mounted drives.
- Preserve existing volume mount points; when selected, existing mounts are protected on the volume.
- Restore the Cluster Registry to the quorum disk and all other nodes; if applicable for this domain controller, the cluster quorum database is restored.
- When restoring replicated data sets, mark the restored data as the primary data for all replicas; this option should be enabled if you are performing a Primary restore of Active Directory.
- Click Next. Click Finish to start the Normal Restore of Active Directory.
How to perform an Authoritative Restore of Active Directory.
- Perform a Normal Restore of Active Directory.
- When prompted to restart the server, click No and then close the Windows Backup Utility.
- Click Start, Run, and enter cmd in the Rn dialog box. Click OK.
- To open the Ntdsutil command-line utility, enter ntdsutil.
- Enter authoritative restore.
- To specify Active Directory, or components of Active Directory as authoritative, use one of the following methods:
- Enter restore database; this sets the domain and all configuration containers as authoritative.
- Enter restore subtree, together with the distinguished name of the Active Directory object you want to mark as authoritative.
- You can use the verinc option with either of the above commands, to explicitly set the version number. The option is useful when a different Authoritative restore needs to be performed on an existing Authoritative restore.
- When the Authoritative Restore Confirmation dialog box appears, asking whether the Authoritative restore should be performed, click Yes.
- Enter quit, and enter quit again to close the Ntdsutil command-line utility.
- Proceed to reboot the server.
Recovering IIS Metabase Data
To recover IIS metabase data:
- Open the IIS Manager.
- Right-click the IIS server whose metabase data you want to restore, select All Tasks from the shortcut menu, and then select Backup/Restore Configuration.
- The Configuration Backup/Restore dialog box opens. The Configuration Backup/Restore dialog box displays the following information:
- The initial configuration backups created when IIS was first installed.
- All manually created backups.
- All history files.
- Select the backup that you want to use for the restore and then click the Restore button to start the restore of the metabase data.
- Click Yes to start the restore.
Recovering from Complete Server Failures
- Exchange Server 2003.
- Windows Server 2003.
To prepare to recover an Exchange Server 2003 server, you have to follow the requirements summarized below:
- Replace all failed hardware.
- The following installation CDs have to be available:
- Windows 2003 installation CD.
- Exchange Server 2003 installation CD.
- Full backups of the system drive should exist and be available.
- You should have backups of each Exchange Server 2003 database.
- A Windows 2003 system state backup set should be available.
- Each member server object should exist in Active Directory.
- For an only domain controller in a domain, you should have a backup of the specific domain controller.
How to manually restore a system:
- Start by installing a new operating system (same version) on the original system hardware and disk volume.
- Next, name the system using the same name as the original server. Do not join the domain at this point.
- Perform a basic installation, do not install any additional services during the installation of the operating system.
- Install all necessary hardware drivers.
- Update the operating system with all necessary service packs and security patches.
- Open the Disk Management console and then create the disk volumes needed. Format the disk volumes correctly and assign the proper drive letters.
- Proceed to join the server to the domain.
- Install any needed additional services or applications.
- Install Exchange Server 2003. You should use the same version of Exchange which was previously installed.
- Install all necessary Exchange service packs.
- You can at this point restore the Exchange dta to the server.
- Start a full backup of the restored system.
How to back up system state data:
- Open the Windows Backup utility.
- Start the Backup Or Restore Wizard.
- Click Next on the Welcome To The Backup Or Restore Wizard page.
- When the Backup Or Restore page opens, select the Back Up Files And Settings option and click Next.
- Select the Let Me Choose What To Back Up option on the What To Back Up page and click Next.
- Using the Items To Back Up box, select the System State checkbox. Click Next.
- In the Choose A Place To Save Your Backup box, set the location of the backup.
- In the Type A Name For This Backup box, set the name of the backup. Click Next.
- Click Report to verify that no errors have been encountered.
How to restore System State data:
- Open the Windows Backup utility.
- Open Advanced mode by clicking the Advanced Mode option.
- Select the Restore and Manage Media tab.
- Expand the media and backup to use for the restore.
- Enable the System State checkbox.
- Use the Restore Files list to choose Original Location.
- Click the Start Restore option.
- Click OK to verify that the restore will overwrite the existing System State.
- Click OK on the Confirm Restore message box to start the restore process.
- Click the Report button to examine the restore report log.
How to replicate restored data across the domain :
To replicate restored data across the network, use the steps detailed next. The domain controller server has to be shut down when you begin this process.
- Proceed to restart the domain controller server.
- Press F8 when the Please Select The Operating System To Start option is displayed.
- This action displays the Advanced Options Menu.
- Choose Directory Services Restore Mode.
- Once the system starts, restore System State data and any other necessary files using the Windows Backup tool.
- When the data is restored, use the Ntbackup command-line tool to specify objects as authoritative. This has to done prior to restarting the server.
- Restart the server to replicate the data across the domain.
How to perform an ASR restore:
- Restart the Computer.
- Insert the Windows XP Professional or Windows Server 2003 installation CD-ROM in the CD-ROM drive.
- Enter the text-mode part of setup.
- When prompted, press F2 to start the Automatic System Recovery process.
- When prompted, insert the Windows Automated System Recovery disk into the floppy drive and then press any key to continue.
- Setup prepares for the Automated System Recovery.
- The basic version of the operating system is next loaded.
- Setup now proceeds to copy files to the hard drive, and then restarts the computer.
- The Automated System Recovery Wizard appears automatically, requesting the backup location.
- Select the backup location to continue with the remainder of the setup.
- After the Automated System Recovery process completes, the Backup utility opens automatically to restore the system.
How to restore an Exchange Server 2003 member server:
- If you are able to access the hard disks of the problematic Exchange server, then you should copy the Exchange Server 2003 database files on the server to a different location.
- Next, if necessary, replace all damaged hardware.
- Proceed to install Windows 2003 on the server.
- Restore the Windows backup set to restore the Windows 2003 system files and registry database, and the IIS metabase files.
- Install all necessary service packs and software updates.
- Install all applications on the server.
- You can now run Exchange Server 2003 Setup in Disaster Recovery mode to install the Exchange applications and Exchange files. The configuration information of the original server that you recovered includes:
- Storage group names
- Mailbox store names
- Public folder store names
- Virtual server configuration
- Verify that each component which existed on the damaged server is selected for Disaster Recovery.
- Install Exchange Server 2003 to the same drive and directory.
- Install any Exchange Server service packs and hotfixes.
- Restore the Exchange Server 2003 databases.
Recovering Exchange Databases and Data
If you have created copies of the database files which you want to restore, you should perform a recovery using the online backup. The Exchange Information Store (IS) service controls the restore process.
The various functions that occur in the restore process are listed here:
- Existing database files are replaced with restored database files.
- The restored database files of the backup media are copied to the temporary log directory.
- The Restore.env file is created for each restore operation, in the same directory as the log files which were restored through the backup media.
- The log file signature of the temporary log files are checked to determine whether the restored log files match with the storage group which manages the database.
- Replays and applies the restored log files to the database.
- Replays and applies the log files of the active storage groups to the database.
- Removes the log files from the temporary log directory.
You can also restore multiple stores to multiple storage groups simultaneously. This is done by running multiple instances of the Windows Server 2003 Backup utility. To do this, you need to perform the following tasks:
- You have to restore each backup set from backup media, to its own individual temporary log directory.
- The Last Backup Set checkbox should not be selected.
- You have to use the Last Backup Set option to initiate recovery.
- You then have to run the utility with the /cc switch in each temporary directory.
If you need to recover mailboxes where the default retention period of the mailbox retention option has passed, you would have to use a recovery server and perform the following activities:
- Install a recovery server in an Active Directory forest other than the one that the current server is located in.
- Install Exchange Server 2003 on the recovery server. The same organization name previously used should be used.
- Recover the database to an administrative group.
- The restore storage group and the restore logical database should have the same name as the original storage group and logical database.
- Create a .pst file.
- You can now move all data that you need to recover to the .pst file.
- Open the .pst file on the production Exchange server and then copy the data to the appropriate location.
One method of recovering mail from a corrupt database is to move the affected mailboxes to another server in the Exchange site. When you move mailboxes, all the components listed here are moved:
- Mail and mailbox information
- Contacts
- Calendar
When the mailbox information is moved to the other server, the information is defragmented. Corruption is not migrated with the move.
If you need to recover a public folder, then you should use the process outlined below:
- Install and configure a recovery server.
- You can use the Windows Server 2003 Backup utility to restore the public folder store.
- Open Outlook and copy the public folder to a .pst file.
- On the production Exchange server, copy the .pst file into your profile.
- Copy the folder back to the public folder tree.
With OWA 2003, you can recover deleted Outlook items that have been removed from the Deleted Items folder. You can only though recover these items if the purge date configured on the Exchange server has not passed.
How to restore the Exchange database files (from tape):
- Open the Windows Backup utility.
- Click the Advanced Mode link to run the Backup utility in Advanced mode.
- Click the Restore Wizard (Advanced) button.
- The Restore Wizard initiates.
- Click Next on the Welcome To The Restore Wizard screen.
- The What to Restore page opens.
- Select the backup medium and then expand the items.
- Select the .edb and .stm files.
- Click Finish on the Completing the Restore Wizard page.
- The restore of the Exchange database files starts.
- Access the Restore Progress dialog box to view the backup log information.
How to move mailboxes between servers in an Exchange site:
- Open Exchange System Manager.
- Navigate to and select the Administrative Group that contains the mailboxes which should be moved.
- Select each mailbox which should be moved.
- Click the Action menu and select Exchange Tasks.
- Click Next on the Exchange Task Wizard welcome page.
- On the Available Tasks page, select the Move Mailbox option and then click Next.
- The Move Mailbox page is displayed.
- The existing location of the mailbox is displayed in the Current Mailbox Store textbox.
- Use the Server drop-down list box and the Mailbox Store drop-down list box to specify the new location for the mailbox. Click Next.
- On the following page displayed, you have to specify how Mailbox Move handles corrupted messages in the mailbox.
- Click Next to start the mailbox move process.
- Click Finish.
How to recover deleted items using Outlook Web Access:
- Open Outlook Web Access.
- Navigate to the Outlook Options area.
- Navigate to the Recover Deleted Items area.
- Click View Items.
- The Recover Deleted Items dialog box opens.
- Select each item that you want to recover.
- Click the Recover button.
- Click Close.
- All items specified to be recovered will be displayed in the locations from where they were previously deleted.
- If you want to purge items completely, then you have to select the Permanently Delete option. After this option is selected, you will be unable to recover those items in the Recover Deleted Items dialog box.
- Click OK.
- Click Close.
Restoring Mailboxes using Exmerge.exe
Once a database is restored to the Recovery Storage Group, the ExMerge utility (Exmerge.exe) can be used to move the mailbox data to the storage group. A Recovery Storage Group cannot be accessed by users because the group is disconnected. You can recover one mailbox or recover the entire database.
The requirements listed here have to be met to use a Recovery Storage Group:
- The Recovery Storge Group must be created on the Exchange server.
- The account which you are using must have the following permissions on all Exchange mailboxes:
- Receive As permission
- Send As permission
- The original database and mailbox should exist in Active Directory.
The process for using a Recovery Storage Group to restore mailbox data is outlined here:
- Create and configure the Recovery Storage Group on the Exchange server: To do this, you have to complete the following steps:
- Configure the Recovery Storage Group using the context menu of the server object.
- Set the transaction log location.
- Set the system path location.
- Add the database which you want to recover to the Recovery Storage Group
- Restore the mailbox database to the Recovery Storage Group: To do this, you have to complete the following steps:
- You should use a backup and restore application to restore the mailbox database to the Recovery Storage Group.
- Choose the database and log files that should be restored.
- Specify the temporary file directory.
- Mount the store once the restore has completed.
- Merge the mailbox data of the restored database to the original database: To do this, you have to complete the following steps:
- Start Exmerge.exe and then initiate the Microsoft Exchange Mailbox Merge Wizard.
- Using the various prompts of the Exchange Mailbox Merge Wizard, define the export method.
- You also have to specify the source and destination server.
- Specify the databases within the Recovery Storage Group for restoring.
- Specify a single mailbox to restore, or specify multiples mailboxes.
- Select the temporary folder.
- After completing the Exchange Mailbox Merge Wizard, data is copied from the mailboxes in the recovery database and merged with the appropriate mailboxes of the original database.
How to run the Exchange Mailbox Merge Wizard:
- Install the Exmerge.exe and Exmerge.ini on the server.
- Start Exmerge.exe.
- The cc initiates.
- Click Next on the Exchange Mailbox Merge Wizard Welcome page.
- On the Procedure Selection page, select the Extract And Import (One-Step Procedure) option, and then click Next.
- On the Source Server page, select the source server.
- To control how the mailbox merge procedure runs, click the Options button.
- A dialog box is displayed, displaying a number of tab (pages) which can be used to define a number of options.
- On the Data page, you can define settings that control how much data is migrated. The default option is that the User Messages And Folders checkbox is enabled. Select which additional data should be included in the migration.
- On the Import Procedure page, you can specify how the migrated data is written to the destination mailbox.
- On the Folders page, you can specify which folders in the mailbox are included in the migration procedure. The default setting includes all folders in the migration. Specify which folders should be part of the migration process.
- On the Dates page, you can specify that only messages that fall within a certain date period are included in the migration procedure. The default setting includes all messages in the migration — the date is not considered.
- On the Message Details page, you can specify that only specific types of messages are included in the migration, based on criteria such as mssage subjects or attachment names.
- Click OK and click Next.
- On the Destination Server page, specify the name of the destination server for the migration and then click Next.
- On the Mailbox Selection page, select the mailbox in the available list that should be migrated, and then click Next.
- If you are migrating mailboxes to a server in a different local, specify the appropriate option in the available list and click Next.
- On the Target Directory page, select the folder that should be used to store the temporary files utilized in the migration. Click Next.
- Specify whether these settings should be saved or not saved, and then click Next.
- The Process Status window opens, showing the status of the migration procedure.
- Click Finish.
Restoring Exchange Server 2003 Clusters
The common restore processes that you would need to perform when restoring Exchange Server 2003 clusters are listed here:
- Recover a server node in the cluster: The Exchange resources of a failed cluster node are moved to another online node in the cluster. This basically means that the Exchange databases can continue to be accessed by the Exchange virtual server from the other node. If you need to remove the failed cluster node from the cluster and replace it with another node, you can use the process below as a guideline:
- Using Cluster Administrator, evict the server node from the cluster.
- Create and install the new server node.
- Rejoin the node to the cluster.
- Install Exchange on the node.
- Move the Exchange resources to this node.
- Recover a cluster quorum disk resource: You can use the process below as a guideline for recovering from a cluster quorum failure:
- On each server node in the cluster, stop the Cluster Service.
- Restore the system state data that holds the cluster quorum disk, using the Windows Backup utility.
- Run the Clusrest.exe Resource Kit tool to restore the backup to the cluster quorum disk.
- Recovering the shared disk resource that contains the Exchange databases:
- Ensure that the Do Not Mount At Startup check box for the databases that you want to restore is selected, for the databases residing in the cluster.
- Proceed to restore the Mailbox store form the backup.
- Check that the databases have been mounted.
- Check the content of the Event log.
- Deselect the Do Not Mount At Startup checkbox for each database that is restored.
How to pause and resume a node
- Click Start, Administrative Tools, and then click Cluster Administrator.
- In the left pane, select the node which you want to pause.
- Select the Pause Node command from the File menu item.
- To resume the node that was paused, click Start, Administrative Tools, and then click Cluster Administrator.
- In the left pane, select the node which was paused.
- Select the Resume Node command from the File menu item
How to evict a server node from the cluster:
- Click Start, Administrative Tools, and then click Cluster Administrator.
- Stop Cluster Service running.
- Select the Evict Node command from the File menu item.
- Remove the node from the shared bus.
- Uninstall Cluster Service.
- Proceed to do the necessary maintenance tasks.
- When done, connect the node to the shared bus.
- Install Cluster Service, and then join the cluster.
Best Practices for Restoring Exchange Server 2003
A few best practices for restoring Exchange Server 2003 are listed here:
- The Exchange environment should be documented so that the time needed to perform a recover is kept to a minimum.
- All Exchange Server 2003 administrators should have sufficient knowledge to perform an Active Directory recovery. This is important because Exchange Server uses Active Directory for its user directory.
- To protect and prepare your environment from an Exchange site failure, consider implementing a failover site capability.
- When it comes to corrupt databases, one method of recovering mail from a corrupt database is to move the affected mailboxes to another server in the Exchange site. This strategy results in the Exchange system still being operational.
- To simplify the Exchange recovery process, run Exchange Server 2003 Setup in Disaster Recovery mode to install the Exchange applications and Exchange files.
- If you do not want to perform a database repair, you should use the ExMerge utility (Exmerge.exe) to move mailbox data to a storage group on a new server. Any corrupt information will be left on the other system.
- If you want to simplify the process of recovering information from backup, you should create and use a recovery storage group.
- You can use the Eseutil utility and Isinteg utility, which are Exchange maintenance tools, to perform offline Exchange database maintenance tasks. Use the tools to maintain database integrity and test databases. The Eseutil utility can be used to perform maintenance tasks for both Active Directory databases and Exchange databases. Be careful when using these tools to repair corrupt databases – you could end up with data loss issues.
|
|
Comments - No Responses to “Restoring Exchange Server 2003”
Sorry but comments are closed at this time.