
Installing Exchange Server 2003 Clusters
Microsoft Cluster Service Overview
Microsoft Clustering Server (MSCS), initially launched in the Windows NT Server Enterprise Edition, enabled organizations to increase server availability for mission critical resources by grouping multiple physical servers into a cluster. Servers in the cluster are referred to as nodes, while services and applications are referred to as resources. A cluster can be defined as the grouping of two or multiple physical servers that are portrayed as, and operate as one network server. These servers provide redundancy to the enterprise network by resuming operations of a failed server within the cluster. This procedure is known as failover. The process of failback occurs when a failed server automatically recommences performing its former operations once it is online again. The cluster can also be configured to provide load balancing features. With the introduction of Windows 2000 this technology became known as Microsoft Cluster Service. Microsoft Cluster Service is best suited for network services that require a high degree of availability. Windows Server 2003 can support eight node server clusters.
Resource DLLs manage resources in the cluster, and provide the mechanism for Cluster Service to maintain communications with its supported applications. A quorum resource has to exist in order for a node in the cluster to carry out its functions. This common resource holds the cluster database’s synchronized version that stores management data for the cluster. The quorum resource is located on the physical disk of the shared drive of the cluster. Clustering software such as resources makes is possible for the cluster to operate. Administrative software is the software utilized to manage the cluster, such as Cluster Administrator.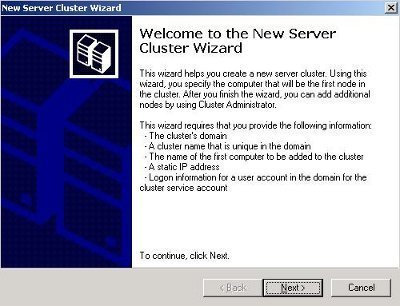
A few advantages of installing cluster servers are:
- Clustering technology provides redundancy for network failures because another node is the cluster resumes the services of the failed server. This increases server availability for mission critical applications and network services.
- Application response time can be improved by dispersing applications across multiple servers.
- There is no manual configuration associated with failback because the failed server automatically takes on its former operations.
- Cluster Service also reduces downtime associated with scheduled maintenance downtime. When a server in the cluster is scheduled for an upgrade, its services and applications can be manually moved to another node in the cluster.
- A network utilizing Cluster Service enjoys improved scalability because servers can be expanded while client access is still ensured.
- The nodes, services and applications in the cluster can be managed, controlled and administered remotely, and in the same manner as though they were all hosted on one server.
The clustering terminology used with clustered Exchange 2003 servers is listed here:
- Active/Active; all nodes manage the resource groups in the cluster, and each node can automatically take up the role of another node in the cluster. When one node fails, another node can manage the resources of the failed node.
- Active/Passive; a primary node contains the resource groups specifically defined for it. When the primary node fails, the resources fail over. The primary node manages the resources when it is online again.
- Cluster aware applications; applications that use cluster APIs to communicate with Cluster Service. These applications reside on the nodes in the cluster.Cluster aware applications DLLs are specific to a particular application.
- Exchange Virtual Server; refers to the resource group which holds the resources needed by Exchange to function as a clustered implementation:
- Exchange Services.
- IP Address.
- NetBIOS name of server.
- Dependency defines a relationship between two resources that have to operate in the same resource group.
- Failback; process when a failed server automatically recommences performing its former operations once it is online again.
- Failover; refers to the process when the resources of a failed node are resumed by another node in the cluster.
- Heartbeat; to communicate the status of the nodes in the cluster, the nodes in the cluster exchange heartbeat messages at regular intervals.
- The IsAlive checkis used by the Resource Monitors to verify the status of a resource. When this check fails, the specific resource shifts to offline and the failover process initiates.
- The LooksAlive checkis used by Resource Monitors to verify that resources are running. If this check’s result is unclear, then the IsAlive Check starts.
A node in the cluster can be in one of the following states:
-
- Down; the resources of the node have been taken up by another node.
- Paused; the node is paused for an upgrade or testing.
- Unknown; the state of the node cannot be determined.
- Up; the node is operational.
- Quorum resource; a common resource which contains the synchronized cluster database. The quorum resource has to exist in order for a node to operate. The quorum resource exists on the physical disk of the shared drive of the cluster.
- Resource DLL; provides the means for Cluster Service to communicate with the Exchange services supported in the cluster.
- Resources; hardware and software components of the cluster. Services and applications in the cluster are called resources. Resources in the cluster are added to Cluster Groups to create Exchange virtual servers.
- Resource group; contains all resources needed for a specific application. Each resource group has an IP address and network name which are unique. Resources that are dependent on another resource must reside in the same group, and on the same node.
Server clusters can be deployed, using either of these server cluster designs:
- Single Node cluster: In this design, the cluster has one node. No failover can occur for the cluster. When a resource fails, Cluster Service will try to automatically restart applications and resources. An external disk is not necessary because the local disk can be set up for storage purposes. Multiple virtual servers can be created. The Single Node cluster is typically used for development.
- Single Quorum Device cluster: This cluster design has two or more nodes. One node can be configured as the hot standby device and another node can be configured to host different applications. Each node in the cluster must connect to the storage devices of the cluster. A single quorum device is located on the storage device. One copy of the cluster’s configuration exists on the quorum resource. This is the most commonly used cluster design model.
- Majority node set (MNS) cluster: Here, each node in the cluster does not need to connect to the storage devices of the cluster. Cluster Service ensures that configuration between the nodes are constant. Each node maintains its own cluster configuration information. Quorum data synchronization occurs over Server Message Block (SMB) file shares.
The cluster operation modes in Windows Server 2003 are listed here. The cluster operation mode defines how failover and failback occurs in the cluster:
- High Availability with Static Load Balancing: The nodes each have particular resources that they are accountable for. To ensure availability during failover, each node has to be sufficiently capable of supporting another node’s resources. This configuration model leads to decreased performance fo the duration of the failover.
- Hot Spare Node with Maximum Availability: A single primary node manages the resources. The hot spare node is not utilized at the same time as the primary node. This node only manages the resources when the primary node has a failure. This model ensures high availability and high performance during failover.
- Partial Cluster Service: This model builds on the principles of the former model. When failover occurs, the cluster unaware applications stay unavailable for the duration of the failover. Cluster unaware applications are not part of this process and performance for these applications is greatly reduced at times of failover. This configuration model provides high availability for resources that are included in the failover process.
- Hybrid Model: This model can be regarded as a grouping of the above configuration models. In this configuration model, each node in the cluster manages its own resources. Because this model is a grouping of the other models, availability during failover is ensured for those resources specified for failover.
Network Load Balancing (NLB) Overview
Windows Network Load Balancing (NLB) is a clustering technology that provides high availability and scalability. NLB is typically utilized to assign Web requests between a cluster of Internet server applications. NLB reroutes any requests that are sent to a failed NLB cluster server. With NLB, client requests are load balanced according to the configured load balancing parameters. Servers in the NLB cluster can therefore be configured to share the processing load of client requests. The Wlbs.sys driver of NLB is configured for each server in the cluster, and functions between the network adapter and the TCP/IP protocol. The driver manages and allocates client requests to a server in the cluster.
With NLB there is no single instance of failure purely because it is regarded as a distributed application. Throughput is maximized because the broadcast subnet is utilized to distribute client requests to the cluster servers. These client requests are then filtered on each cluster server.
To ensure high performance, NLB uses a distributed filtering algorithm to match incoming client requests to the NLB servers in the cluster when making load balancing decisions. When an incoming packet is received, all the NLB servers check to determine which NLB server should handle the client request. The NLB servers use a statistical mapping that determines a host priority for the incoming packet, to identify the NLB server that should handle the request. Once the NLB server is identified for the packet, the remainder of the servers in the NLB cluster discards the packet. Each server in the NLB cluster utilizes and transmits heartbeat messages to identify the state of the cluster. The heartbeat message holds information on the state of the cluster, and the cluster configurations and associated port rules.
The servers in a NLB cluster send heartbeat messages to determine the state of the cluster. Each heartbeat message contains the following information:
- Information on the state of the NLB cluster.
- Information on the configuration of the cluster.
- Information on port rules.
The advantages of NLB clusters are listed here:
- The NLB cluster can automatically detect when one server has a failure, and then reroutes traffic requests to the other servers in the cluster which are online. This leads to enhanced availability for mission-critical applications.
- The performance of applications can be scaled because client requests are distributed between multiple servers in the NLB cluster.
- You can easily add additional servers to an NLB cluster as the network expands. The NLB cluster does not have to be shut down to add or remove servers from the cluster.
- Client requests to the NLB cluster are load balanced, based on the processing configuration specified for the cluster. You can also configure port rules to specify any servers that should process specific requests.
When you implement an Exchange 2003 cluster-aware version, a number of additional benefits and features are available, which are not available with the Exchange 2003 Standard version:
- Exchange 2003 performs prerequisite checking to determine whether all installation requirements have been met.
- Up to an 8 node cluster is supported.
- Clustering uses the Shared Nothing architecture when nodes are in a cluster.
- Kerberos authentication is enabled by default.
- Volume mount points can be used with Windows Server 2003 cluster implementations.
Clusters and Load Balancing Installation Requirements
The hardware components of a cluster are briefly outlined below:
- A shared Small Computer System Interface (SCSI) bus and two network cards. The shared SCSI enables nodes in the cluster to access the cluster disks.
- A local disk where the operating system is to be installed.
- The public network adapters supply client connectivity. It also provides the communication channel between the nodes in the cluster. Nodes exchange heartbeat messages at regular intervals.
- Implementing a private network adapter ensures hardware redundancy.
The cluster nodes are typically connected by the following connections:
- The Shared Storage Bus connects the nodes to the disks at which the clustered data is stored.
- The Public Network Connection connects client computers to the cluster’s nodes. It is recommended that fast reliable network cards be utilized for the public network. Examples include Fast Ethernet or Fiber Distributed Data Interface (FDDI) network cards.
- The Private Network Connection.
connects the nodes within the cluster. Low cost Ethernet cards are recommended.
Certain limitations exist when it comes to virtual servers and Exchange Server: Some components can only run when in an active/passive configuration; while others are just not supported in a clustered server environment:
- HTTP: Active/active configuration.
- IMAP: Active/active configuration.
- SMTP: Active/active configuration.
- SA: Active/active configuration.
- POP3: Active/active configuration.
- Information Store: Active/active configuration.
- Full text indexing: Active/active configuration.
- Chat: Active/passive configuration.
- MTA: Active/passive configuration.
- Instant Messaging, Key Management Service (KMS), and NNTP are not supported.
In addition, the cluster storage device has specific requirements and the components listed here cannot be included:
- Dynamic volumes.
- Encrypting File System.
- IDE disks.
- Mount points and mounted volumes.
- Remote Storage.
- Software RAID.
The requirements for installing server clusters are:
- Administrative permissions are needed on each node in the cluster.
- Windows 2003 Enterprise Server or Windows 2003 Data Center Server Editions.
- With the Exchange Server 2003, the Exchange Server 2003 Enterprise Edition must be used.
- There should be sufficient disk space on the system drive and shared device for the Cluster Service installation.
- The appropriate network adapter drivers must be used, and the network adapters must have the have the proper TCP/IP configurations.
- File and Print Sharing for Microsoft Networks has to be installed on a node to configure Cluster Service.
- The nodes should be configured with the same hardware and device drivers, and each node must belong to the same domain. The domain account utilized should be identical on each node in the cluster.
- The system paging file must have sufficient space to prevent decreased performance. When the file has insufficient space, it can result in a system lockup.
- The shared drives must be physically attached to the nodes that belong to the cluster.
- The NTFS file system should be used to format the partitions of the shared disk.
- Shared disks should be configured as a Basic disk.
- The SCSI drives and adapters must each have a unique SCSI Identifier (ID).
- Each server must have two PCINICs.
- The storage host adapter for SCSI or Fibre Channel must to be separate.
- An external drive which has multiple RAID configured drives must be connected to the servers of the cluster.
- Consider using hardware RAID 1 or RAID 0+1 for the Exchange Server transaction log drives.
- Consider using RAID 5 or RAID 0+1 for database storage.
- The cluster must have a unique NetBIOS name.
The requirements for installing NLB are:
- The TCP/IP protocol.
- Fiber Distributed Data Interface (FDDI), Ethernet or Gigabit Ethernet.
- 1.5 MB available hard disk space.
- 4MB – 250 KB RAM.
- You should have two network adapters for each cluster host.
- The hosts residing in the NLB cluster should exist in the same physical subnet.
- The applications which you plan to add to the NLB cluster must be capable of using TCP or UDP ports.
- Clients must be able to connect to the NLB cluster using TCP/IP.
- Plan server capacity based on the types of applications which you plan to add to the NLB cluster.
- Add servers to the NLB cluster until the expected client request load can be handled by the cluster. Be careful to not overload the cluster.
- The servers should be properly configured to run the applications which they host. With NLB, all applications that can be configured to use TCP/IP with the appropriate port can be configured for load balancing. Applications supported in a NLB cluster include FTP, TFTP, SMTP, HTTP, and HTTPS.
Installing Exchange 2003 Clusters
You can use either of these methods to place Exchange 2003 virtual servers in a cluster:
- New installation method: Requires all Exchange 2003 preparation tasks to be completed before deploying Exchange 2003 in the cluster.
- Post First Server method: Here, the Exchange services and user mailboxes are deployed to the cluster after the Exchange 2003 environment is installed and running.
- Coexistence method: Here the Exchange 2003 clusters and existing Exchange 2003 server coexist in the same environment.
How to create a Windows 2003 cluster:
- Install the Windows 2003 Enterprise server.
- For the network adapters in the server, configure the network TCP/IP address setting.
- Create the cluster service administrative account in the domain wherein the server is located.
- To do this, click Start, Administrative Tools, and then click Active Directory Users and Computers to open the Active Directory Users and Computers management console.
- Navigate to the Users container.
- Create a Cluster Service user account.
- Close the Active Directory Users and Computers.
- Next, create any necessary additional disks and format the drives with NTFS. Dynamic disks should be changed to Basic.
- Verify domain membership.
- Verify server operations.
- With Windows 2003, clustering is installed when Windows 2003 Enterprise server software is installed.
- To create the cluster, click Start, Administrator Tools, and then click Cluster Administrator.
- The Cluster Administrator management console opens.
- On the Open Connection to Cluster dialo box, click the Create new cluster command on the Action menu. Click OK.
- The New Server Cluster Wizard initiates.
- Click Next on the New Server Cluster Wizard Welcome screen.
- On the Cluster Name and Domain page, provide a name for the cluster in the Cluster name text box, and specify the domain in the Domain drop-down list box. Click Next
- On the Select Computer page, provide the name of the first computer which will be the initial node in the new cluster. Click Next.
- On the Analyzing Configuration page, use the buttons available to determine what activities the Wizard performed to verify the node. Click Next.
- On the IP Address page, enter the IP address for the new cluster in the IP Address box, and then click Next.
- When the Cluster Service Account page opens, enter the user name, password and domain details of the cluster service account. Click Next.
- The Wizard now shows the configuration for the new cluster on the Proposed Cluster Configuration page. Click OK.
- The Wizard next starts to create the new server cluster.
- When the Creating the Cluster page appears, click Next. Click Finish to close the New Server Cluster Wizard.
- The new cluster is displayed in the Cluster Administrator management tool.
How to add nodes to a Windows 2003 cluster:
- Log on to the node using Cluster Administrator account.
- Click Start, Administrative Tools, and then click Cluster Administrator.
- Select Add Nodes to a Cluster.
- In the Cluster Name text box, provide the name of the cluster and then click OK.
- The Add Nodes Wizard launches.
- Click Next on the Add Nodes Wizard Welcome page.
- Specify the server name of the cluster node in the Selected Computer text box and then click Add. Click Next.
- After testing has been done, provide the password for the Cluster Service account and then click Next.
- On the Proposed Cluster Configuration page, verify the settings which have been specified and then click Next.
- Click Finish to close the Add Nodes Wizard.
Before you install Exchange Server 2003 on a cluster node, you have to install the following Windows services:
- Simple Mail Transfer Protocol (SMTP) service.
- Network News Transfer Protocol (NNTP) service.
- World Wide Web service.
- Microsoft ASP.NET.
- Microsoft .NET Framework.
You also have to install the Microsoft Distributed Transaction Coordinator:
- Click Start, Administrative Tools, and then click Cluster Administrator.
- Expand the Groups node in the console tree.
- Right-click Cluster Group, select New and then select Resource from the shortcut menu.
- Enter MSDTC for the resource name.
- Select Distributed Transaction Coordinator as the resource type. Click Next.
- Ensure that the proper detail is specified on the Possible Owners page, and click Next.
- Specify Cluster Name and the disk resource as dependencies.
- Click Finish.
- The MSDTC resource is next created.
- You now have to bring the MSDTC resource online.
- In the Cluster Administrator, right-click the MSDTC resource, and then click Bring Online from the shortcut menu.
How to install a cluster-aware Exchange 2003 version:
- Using an account which has Domain Admins and Exchange Admins membership, log on to the cluster node.
- Install the Exchange 2003 Enterprise Edition on the node.
- Choose to install Microsoft Messaging and Collaboration and Microsoft Exchange system Management Tools.
- Proceed to install Exchange to the local drive on the node.
- A message dialog box is displayed, needing verification to install a cluster-aware Exchange Server version. Click OK.
- Proceed to install the Exchange server as you normally would.
Configuring Exchange 2003 in a Cluster Environment
A few administrative tasks which you can perform for the cluster through the Cluster Administrator management tool are listed here:
- Add applications to the cluster. You can initiate the Cluster Application Wizard from Cluster Administrator if you want to add applications to the cluster.
- Create new resource groups for the cluster.
- Configure the failover and failback policy for the resource group.
- Delete resource groups for the cluster. The resources of a resource group are deleted when a group is deleted.
- Create resources for the cluster and assign resource dependencies.
- Delete resources. You can though only delete a resource once all its assigned dependencies are deleted.
- Change the name of the cluster.
- Change ownership for a resource groups. Resources can be moved from one resource group to another group, and you can move a resource group from one node in the cluster to another node in the cluster.
- Change properties of existing resources and resource groups. You can also rename existing resources and resource groups.
- View information on the state of the cluster.
- Change the state of resource groups. When you change the state of a resource group to either online or offline, then the resources of the particular group are automatically updated to reflect the modified state change.
An Exchange Server 2003 virtual server contains the following resources:
- IP address (static) resource.
- Network name resource.
- Shared physical disk resource.
- Exchange System Attendant resource.
Each of these resources has to be created using the Cluster Administrator management tool.
When you create the Exchange System Attendant resource, the Exchange System Attendant creates the Exchange Server 2003 virtual server resources listed here:
- Exchange HTTP Virtual Service Instance.
- Exchange Information Store Instance.
- Exchange Message Transfer Agent Instance.
- Exchange MS Search Instance.
- Exchange Routing Service Instance.
- SMTP Virtual Server Instance.
How to configure Exchange 2003 in a cluster using the Cluster Application Wizard:
- Open Cluster Administrator.
- Select the cluster node.
- Select File and then Configure application.
- The Cluster Application Wizard starts.
- Click Next on the Cluster Application Wizard Welcome page.
- On the Create new Virtual Server page, select the Create New Virtual Server option and then click Next.
- When the Resource Group page opens, select Create New Resource and then click Next.
- Provide a name for the resource group.
- Provide a description for the resource group. Click Next.
- On the Virtual server access information page, in the IP address box, provide the TCP/IP address for the Exchange virtual server. Click Next.
- On the Advance Properties page, specify the desired properties for Exchange virtual server. Click Next.
- When the Create Application Cluster Resource page opens, click No and then click Next.
- Proceed to open the properties page of the Exchange Virtual Server Resource and then configure the nodes as possible owners.
- To create the Network Name resource, select the Exchange 2003 virtual server, select File and then select New and Resource.
- Configure the Network Name resource for the Exchange virtual server and configure the TCP/IP Address, DNS information and dependencies.
- Right-click the Exchange virtual server and select Bring Online from the shortcut menu.
- Next, add disk resources to the Exchange virtual server resource group.
- Proceed to create the Exchange Server 2003 System Attendant resource for the Exchange virtual server resource group.
- Select File, select New, Resource, and then select Microsoft Exchange System Attendant as the resource type.
- Next, add the Network Name and Disk resource as Microsoft Exchange System Attendant dependencies.
- Specify the administrative group and routing group for the Exchange virtual server.
- Provide the path for the data directory.
How to create an Exchange 2003 virtual server:
- Open the Cluster Administrator management tool on the first node in the cluster.
- In the left pane, right-click the Groups container and select New and then Group from the shortcut menu.
- The New Group Wizard launches.
- Enter the name of the Exchange Server 2003 group in the Name box.
- In the Description box, provide a brief description for the new group. Click Next.
- Specify the appropriate nodes in the Preferred Owners box on the Preferred Owners page.
- Click Finish to create the new group.
- The Exchange 2003 virtual server is now listed beneath the Groups container in Cluster Administrator.
How to create an IP Address resource for the Exchange 2003 virtual server
- Click Start, Administrative Tools, and then click Cluster Administrator.
- Expand the Groups folder.
- Right-click the Exchange 2003 virtual server, select New and then select Resource from the shortcut menu.
- The New Resource Wizard initiates.
- When the New Resource page opens, provide a name for the new IP Address resource in the Name box.
- In the Description box, provide a description for the new IP Address resource.
- In the Resource Type drop-down list box, choose IP Address as the resource type.
- The Group drop-down list box should reflect the name of the Exchange group. Verify this and click Next.
- On the Possible Owners page, enter the appropriate nodes in the Possible Owners list and then click Next.
- On the Dependencies page, ensure that the Resource Dependencies list contains no information, and then click Next.
- On the TCP/IP Address Parameters page, provide the static IP address of the Exchange 2003 virtual server in the Address box.
- Ensure that the correct subnet mask for the Exchange 2003 virtual server is specified.
- Ensure that the LAN connection to the public network is selected.
- Click Finish to create the IP Address resource for the Exchange 2003 virtual server.
How to create a Network Name resource for the Exchange 2003 virtual server:
- Click Start, Administrative Tools, and then click Cluster Administrator.
- Expand the Groups folder.
- Right-click the Exchange 2003 virtual server, select New and then select Resource from the shortcut menu.
- The New Resource Wizard initiates.
- When the New Resource page opens, provide a name for the network name resource in the Name box.
- In the Description box, provide a description for the new Network Name resource.
- In the Resource Type drop-down list box, choose Network Name as the resource type.
- The Group drop-down list box should reflect the name of the Exchange group. Click Next.
- On the Possible Owners page, enter the appropriate nodes in the Possible Owners list and then click Next.
- On the Dependencies page, select the IP Address resource for the Exchange 2003 virtual server in the Resource Dependencies list, and click Add.
- Click Next.
- On the Network Name Parameters page, provide a name that will identify the Exchange 2003 virtual server on the network in the Name box. Click Next
- Click Finish to create the Network Name resource.
How to create a Disk resource for the Exchange 2003 virtual server
- Click Start, Administrative Tools, and then click Cluster Administrator.
- Expand the Groups folder.
- Right-click the Exchange 2003 virtual server, select New and then select Resource from the shortcut menu.
- The New Resource Wizard initiates.
- When the New Resource page opens, provide a name for the Disk resource in the Name box.
- In the Description box, provide a description for the new Disk resource.
- In the Resource Type drop-down list box, choose Physical Disk as the resource type.
- The Group drop-down list box should reflect the name of the Exchange group. Click Next.
- On the Possible Owners page, enter the appropriate nodes in the Possible Owners list and then click Next.
- On the Dependencies page, ensure that the Resource Dependencies list contains no information, and then click Next.
- On the Disk Parameters page, choose the disk. Click Next.
- Click Finish to create the Disk resource for the Exchange 2003 virtual server.
How to create the Exchange System Attendant resource
- Click Start, Administrative Tools, and then click Cluster Administrator.
- Expand the Groups folder.
- Right-click the Exchange 2003 virtual server, select New and then select Resource from the shortcut menu.
- The New Resource Wizard initiates.
- When the New Resource page opens, provide a name for the Exchange System Attendant resource in the Name box.
- In the Description box, provide a meaningful description for the Exchange System Attendant resource.
- In the Resource Type drop-down list box, choose Microsoft Exchange System Attendant as the resource type.
- The Group drop-down list box should reflect the name of the Exchange group. Verify this and then click Next.
- On the Possible Owners page, enter the appropriate nodes in the Possible Owners list and then click Next.
- On the Dependencies page, select the Network Name resource and Physical Disk resource for the Exchange 2003 virtual server in the Resource Dependencies list, and click Add.
- Click Next.
- On the Data Directory page, specify the location for the data directory.
- Click Finish to create the Exchange System Attendant resource for the Exchange 2003 virtual server.
Managing an Exchange Server 2003 Cluster
The Cluster Administrator management tool is used to configure and manage an Exchange Server 2003 cluster.
A few management tasks that need to be performed for an Exchange Server 2003 cluster are listed here:
- Configure failover and failback policy.
- Back up a cluster node.
- Restore a cluster node.
The failover policyassigned to a particular resource group stipulates the resource group’s actions during the failover process. A failover policy has to be determined for each resource group in the cluster.
The following failover policies can be stipulated for a resource group:
- Failover Timing: In this failover policy, Cluster Service initiates the failover process when a resource group fails. The failed resource group is shifted to another node in the cluster. An optional configuration option available is to allow Cluster Service to restart the resources in the failed resource group for a specific period of time, prior to shifting the resource group to the other node.
- Failback Timing: The default configuration is that the failed resource group is failed back to its primary node or preferred node as soon as it is online again. This can be overridden to a better option which is to allow fail back to only occur during off peak network hours.
- Preferred Node: This option is useful in ensuring that the node specified for, or preferred for a resource group remains the prefered node for the resource group. Specifying a preferred node for a resource group eliminates the need of manually moving a resource back to the node preferred for the resource group.
How to configure a failover policy:
- Open Cluster Administrator.
- Select Open Connection to Cluster.
- Specify the name of Exchange Server 2003 cluster.
- Right-click the cluster group and then select Properties from the shortcut menu.
- Click the Failover tab.
- Specify how many failovers are allowed for a specific time period.
- Click OK.
How to pause/resume a node
- Click Start, Administrative Tools, and then click Cluster Administrator.
- In the left pane, select the node which you want to pause.
- Select the Pause Node command from the File menu item.
- To resume the node that was paused, in the left pane of Cluster Administrator, select the node which was paused.
- Select the Resume Node command from the File menu item.
How to back up a cluster node (ASR backup)
The Automated System Recovery (ASR) is a new feature found in the Windows Backup utility. ASR works by writing operating system files onto backup media and writing disk configuration information to floppy disk.
For ASR to work, you need you to create an ASR set, which includes the following:
- A backup of all critical system files.
- A floppy disk that lists which Windows system files (system settings) is installed on the computer.
When performing an Automated System Recovery, you need the following components:
- Windows Server 2003 installation CD-ROM.
- The ASR backup.
- The floppy disk listing which Windows system files are installed.
ASR consists of the following two components:
- ASR backup: The system information included in an ASR backup is:
- System state data.
- System services.
- Disk configuration information.
- All other files that are connected to the operating system.
- ASR restore: The information restored is listed below:
- A basic version of Windows.
- The copy of the system partition which you backed up using the ASR backup component.
- Disk configuration information needed to start the computer.
The Windows Backup utility is used to create ASR sets. You can access the Backup Utility through one of the following methods:
- Click Start, click Run, and enter Ntbackup.exe in the dialog box.
- Click Start, All Programs, Accessories, System Tools and then select the Backup utility.
Should the Backup utility automatically display the Backup And Restore Wizard, click Advanced Mode. You can initiate the Automated System Recovery Preparation Wizard:
- From the Welcome tab of the Backup utility.
- From the Tools menu.
To back up a cluster node;
- On the cluster node to be backed up, click Start, All Programs, Accessories, System Tools and then select the Backup utility.
- Click Advanced Mode.
- To start the Automated System Recovery Preparation Wizard, click Automated System Recovery Wizard.
- The Automated System Recovery Preparation Wizard launches.
- Click Next on the Welcome to the Automated System Recovery Preparation Wizard screen.
- On the Backup Destination screen, select the backup type and location for the ASR files and then click Next.
- The ASR preparation process next commences.
- Click Finish.
- When the wizard is closed, the backing up of your system files starts automatically.
- When prompted, insert a blank floppy disk into your drive to create the ASR disk. All necessary system settins are copied to the floppy disk.
To restore a cluster node;
- Shut down the cluster that failed.
- Log on to the cluster node that is still active.
- Open the Cluster Administrator.
- Select File and then Open Connection.
- In the Active drop-down list box, select Open Connection to Cluster.
- In the Cluster or Server Name drop-down box, enter a period (.).
- Click OK to establish the connection.
- For each cluster group, disable failback so that the cluster groups do not failover to a node which is not fully restored.
- Close Cluster Administrator.
- On the failed cluster node, insert the Windows Server 2003 installation CD-ROM in the CD-ROM drive.
- Enter the text-mode part of setup.
- When prompted, press F2 to start the Automatic System Recovery process.
- When prompted, insert the Windows Automated System Recovery disk into the floppy drive and then press any key to continue.
- Setup prepares for the Automated System Recovery.
- The basic version of the operating system is next loaded.
- Setup now proceeds to copy files to the hard drive, and then restarts the computer.
- The Automated System Recovery Wizard appears automatically, requesting the location for the backup.
- Select the backup location to continue with the remainder of the setup.
- After the Automated System Recovery process completes, the Backup utility opens automatically to restore the system.
Configuring NLB with OWA
The Network Load Balancing Manager (NLB) Manager administrative tool is used to configure Outlook Web Access (OWA) servers into a load balanced cluster.
How to configure the network cards for the OWA servers:
- Open Control Panel.
- Proceed to select the properties of the Network Connections icon.
- Access the properties of each network card.
- Then bind the appropriate cluster and dedicated IP addresses to the network card of each node.
How to configure the NLB cluster:
- Click Start, click Administrative Tools, and then click Network Load Balancing Manager.
- Click the Cluster menu and then select New.
- In the Cluster IP configuration area of the Cluster Parameters dialog box, specify the IP address, Subnet mask and Full Internet name for the new NLB cluster.
- In the Cluster operation mode section area of the Cluster Parameters dialog box, select the mode for the cluster.
- On the Cluster IP Addresses dialog box, click the Add button if you want to load-balance multiple IP addresses. Click Next.
- On the Port Rules dialog box, the default port rule is displayed. Click the Edit button to configure port rules.
- The Add/Edit Port Rule dialog box opens. You can add and remove port rules.
- Click Next on the Port Rules dialog box.
- On the Connect dialog box, provide the name of the host in the Host field and then click the Connect button.
- Specify the network interface which should be load balanced. Click Next.
- On the Host Parameters dialog box, specify the Priority, Dedicated IP address and Subnet Mask information for the host.
- Set the Default State of the host to Started.
- Click Finish.
- The Network Load Balancing Manager opens, displaying the new cluster.
Best Practices for installing and configuring Exchange Server 2003 Clusters
A few best practices for installing Exchange Server 2003 clusters are listed here:
- Microsoft Cluster Service and Network Load Balancing should not be implemented on the same computer.
- Purchasing good quality server and hardware enhances the fault-tolerance of a system.
- Correctly configuring network hardware adds to the fault-tolerance of a system.
- The simplest cluster configuration to maintain and manage is Active/Passive mode.
- Consider using a RAID technology to provide redundancy for the disk system.
- For each cluster node, consider using multiple network cards. Here, one network card can be dedicated for internal cluster communication usage.
- Ensure that power management is disabled on all nodes in the cluster. This prevents failover from occurring unnecessary.
- You should configure your cluster failback policy to initiate failback only during non-peak business hours.
- Regularly perform ASR backups, and especially after a cluster node has undergone hardware changes.
|
|
Comments - No Responses to “Installing Exchange Server 2003 Clusters”
Sorry but comments are closed at this time.