Windows Networking
Setting up a network of Windows computers is no longer a task that requires an Information Technology (IT) professional. A home network allows you to have a common printer for many computers, share removal drives, play multi-player games, store a single copy of files on a central server, and share a internet connection – the most common task. When setting up a home network, the central host computer should be running the newest version of Windows (normally the most powerful in a common household).
Steps to Setting Up a Windows Network
Step 1 – Make a list of the computer hardware in your home or business that you intend to connect to the network. This may include computers, printers, scanners, and any other peripheries that will be included in the network.
Step 2 – Select the computer that will serve as the Internet Connection Host if you intend to share a single Internet connection using the Windows Internet Connection Sharing (ICS) feature. The computer you are using for the ICS host should be directly connected to the Internet and be running Windows XP or newer to optimize performance of the network.
Step 3 – Choose a networking technology to deploy. There are wireless and wired (Ethernet) options for home networks. If deploying a wireless network, ensure that each computer has a wireless NIC card and purchase a wireless router. If deploying an Ethernet-only network, purchase a network hub (also called a switch) if you intend to connect three or more computers. Connect the Ethernet cable from the client computer to the wireless hub in order to add Ethernet computers to the wireless network.
Step 4– Determine the new equipment you need to purchase in order to establish the network. These may include an Ethernet cable, wireless or traditional NIC cards, and new periphery devices (printers, scanners, etc.) that are network capable.
Step 5 – Install the required network adapters on the network computers if you had to purchase NIC cards. Wireless routers will have an installation CD/DVD for the ICS host computer.
Step 6 – Connect the Ethernet-connected computers to the wireless router in order to mix wireless and wired network connections. If connecting to a wired network, connect them to the hub to run the network. Users may hire contractors to run Ethernet cable across long distances in the home.
Step 7 – Turn on all computers and peripheries that you intend to use in the network.
Step 8 – Connect ICS Host computer to the Internet.
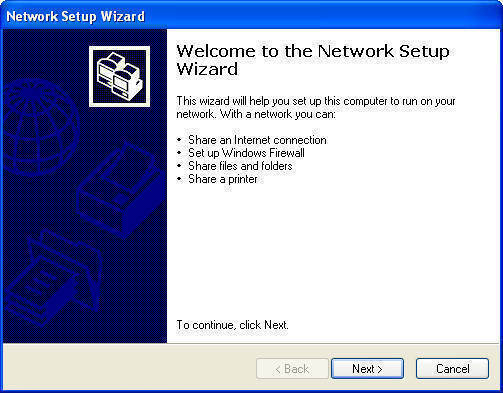
Step 9 – Run the Windows Network setup wizard on the ICS host computer by selecting the “Start,” “Control Panel,“ “Network and Internet Connections,” and “Setup Or Change Your Home or Small Office Network.” Follow the instructions that the connection wizard walks you through. These instructions include: configuring all network computers to share a single Internet connection, configuring network adapters, naming each computer, setting up shared folders and printers, and installing the Internet Connection Firewall.
Step 10 – Run the Network Setup Wizard on all network computers. Connect the ICS Host to the Internet during this process.
What Are the Advantages of Windows Networks?
The biggest advantages of setting up a Windows Network are probably how easy it is to set up and the familiarity of the OS. The Windows Network Setup Wizard automatically configures the majority of your network without the user knowing anything about computer networking. Additionally, the current Windows OSs allow you to use existing hardware and add computers of differing OSs once the network is setup. With the deployment of Windows 7, many of the classic issues with Windows computers (random errors, computer freezes, etc.) have been mitigated significantly. Therefore, users can avoid the added expense of purchasing a new computer that uses an alternative OS.


Comments - No Responses to “Windows Networking”
Sorry but comments are closed at this time.