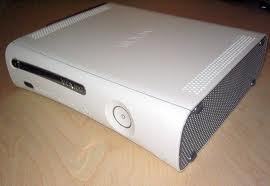
How to Take Apart an Xbox
The Xbox 360 is one of the more popular video game consoles on the market, and is the second generation video player that the Microsoft Corporation produced. The console lets users play video games online and download television shows, movies, music, and new games through the Windows Media Center multimedia capability. Xbox users may need to take it apart in order to clean the components or troubleshoot electrical issues if the Xbox malfunctions. Once the user takes the console apart, any valid warranty on the equipment will be voided.
Tools You Need to Take Apart the Xbox
- T10 Sized Torx style, star head screwdriver
- Small Phillips head screwdriver
- Extremely small, flathead screwdriver
Because the Xbox 360 includes many tabs and screws located throughout the exterior of the device, it is important to be prepared for whatever you might encounter. Before opening an Xbox 360, users should ideally purchase the XCM 360 Case Opening Tool. The XCM 360 Case Opening Tool includes a torx 10 driver for the screws, a metal tab for releasing the plastic clips found on the Xbox 360, and another small metal tab for releasing the clips found near the ventilation. Alternatively, users can use a small screwdriver to replace the XCM 360 Case Opening Tool.
Steps to Take Apart the Xbox 360
Step 1 – Remove all wires from the console.
Step 2 – Depress the power button for a minimum of two seconds to clear residual electrical charge from the Xbox
Step 3 – Press the button the hard drive and pull straight up to remove from the console. Then, remove any memory cards plugged in to the Xbox.
Step 4 – Remove the faceplate (the plastic piece that covers the light ring and drive tray) by using the fingerhole at the bottom of the console and pulling it forward. This may require a decent amount of pressure so do not worry about breaking it. Repeat on the other side to complete the faceplate removal. This step is not completely necessary but it will decrease the user’s chances of breaking the tabs of the top and bottom plates later on.
Step 5 – Once the faceplate is removed, it is time for the user to turn his/her attention to the vent plates attached to the top and bottom of the Xbox 360. The bottom plate has six tabs that must be pressed down one at a time while the user pulls the faceplate away from console. This can be done by poking the metal tab found in the XCM 360 Case Opening Tool (or an alternative object) through the vent holes located on the side of the console. The user will need to alternate sides as there are three pairs of tabs (one on each side) holding the vent plate to the console. Do this gently enough to not break the tabs but use enough force to pry the vent plate away from the console.
Step 6 – Now that the bottom vent plate has been removed, the user will need to remove the top vent plate as well. The top vent plate is more difficult to remove as some of the tabs are hidden. The user can find the first pair of tabs by pressing the opening tool through the hole near the drive tray. The next pair can be removed by pressing the opening tool through the vent hole. One of the Xbox 360 feet must now be removed. A hole should now be revealed in which the user can remove the final pair of tabs.
Step 7 – Insert the flathead screwdriver into the back of the console to separate the top and bottom of the case beginning from the left side then proceeding to the right.
Step 8 – Unhook the tabs on the front of the console (a total of four) to complete separating the case.
Step 9 – Remove the 6 star-shaped screws with the Torx T10 star screwdriver.
Step 10 – Turn the console over so that the white case half remaining is facing up and pull up on the case to remove from the console.
Step 11– Identify the disc drive, motherboard, and cooling fan on the console before proceeding with troubleshooting or cleaning the unit.


Comments - No Responses to “How to Take Apart an Xbox”
Sorry but comments are closed at this time.