How to Make a Web Page
A webpage is a document written in either XHTML or HTML syntax that is accessed through a web browser. Web pages may include text, images, multimedia files, and links to other web pages or resources on the Internet. Learning how to make a web page using HTML tags in a text editor is necessary to make advanced pages using advanced Web page editors.
How to Make a Website
Steps to Make a Basic Web Page
Step 1 – Open the text editor on your computer. For Windows users, the “Notepad” application can be opened by selecting “Start,” “Program Files,” “Accessories” and clicking the “Notepad” program icon.
Step 2 – Save the file with a “.html” extension through the “Save As” file menu utility with a name like “MyTestPage.html.”
Step 3 – Enter an opening and closing “HTML” tag in the document. These tags define the document as a web page and are required entries in any web document.
<html>
</html>
Step 4 – Now, enter the web page document “head” with an opening and closing tag. In the document “head” the page “title” is entered and for more advanced web page, JAVASCRIPT declarations can be included in this part of the document. The head and title tags should be entered in between the “HTML” tags defined in step 3.
<head>
<title>My First Web Page </title>
</head>
Step 5 – Define the web page body which will include the text displayed on the web page along with any imagery or multimedia files you want to include in the document. The body tag definitions should be positioned after the “head” tags but before the closing “HTML” tag definition in the web page document.
<body>
My First Web Page!
</body>
Step 6 – Save the file as a “HTML” file by selecting “File” and “Save As” in Notepad. Click the “All Files (*.*) menu option, enter the file name in quotations and then click the “Save” button. After saving the file, double-click the file icon to automatically launch the file in your computer’s web browser. The complete web document should look similar to:
<HTML>
<HEAD>
<title>My First Web Page </title>
</HEAD>
<body>
My First Web Page!
</body>
</HTML>
What is a Content Management System?
A content management system (CMS) manages a website’s content and makes it easy for a user to post updates without having to deal with the website’s code. It provides a consistent code that automatically updates the website when a new article is published. One of the most reliable and free content management systems available is WordPress.org.
Another necessary thing to do is buy a domain name. Domains can be purchased at GoDaddy, Namecheap, and Network Solutions. Prices may vary, but domains are generally inexpensive.
Once a domain name is purchased, get a web host. Some of the best-known web hosts are Host Gator, 1 and 1, and Host Monster. Sign up for a shared hosting account (many different clients on a managed server).
Log into the domain name provider and then add the name servers. Once this is done, it might take as long as two days for the web hosting to connect to the domain name. However, it is usually done within two hours.
Once this is done, you can set up the website. Here is how to do it using WordPress.
Installing WordPress
The first step is to download it for free from WordPress.org. While it is downloading, go to the c panel and MySQL Databases and create a database, user name, and password. Save this information because it must be filled in later.
With the files now available, open the wp-config-sample.php and locate the information about the DB name, DB user, and DB password. Put in the information created. Change the name from wp-config-sample to wp-config by removing the word ‘sample.’
Upload all the files to the server. If done correctly, the user will be guided through an installation process right after going to the domain.com . Use the name, user name, and password to log in and begin editing and updating the site.
Adding Images and Links to Your Web Page
The most powerful features of a Web Page include the options to provide a hyperlink to another web resource or page as well as display images or other multimedia files.
Step 1 – Open the document in your computer’s text editor.
Step 2 – Select a web page to hyper link to from your document and load in your computer’s web browser. Once you have the page loaded, select the URL in your Web Browser’s tool bar and press the “CTRL” and “C” keys to copy the link. Then, paste the link in between the “body” tags of the web page in your computer’s text editor by selecting the “Edit” and “Paste” menu buttons.
Step 3 – Enter the following tags in the web document.
<a href=”http://www.topbits.com”> </a>
The link in between the quotations after the “href” tag will be the web page to link to from your web document.
Step 4 – Enter anchor text in between the “>” and “<” symbols in step three. This text will be highlighted to link to the web page provided in the “a href” definition.
Step 5 – Add an image to your web page that is stored on the Internet or your local computer for this example. To add an image to the example included in this file, the “img” tag will be used.
To add a hyperlink, enter the following tag definition after the code entered in the previous four step.
<IMG SRC=”http://www.byteguide.com/images/welcomeimage.png”>
Step 6 – Save the file and double-click the file icon on your computer to view in your Web Browser. The following information will then be displayed:
Your test text,
Hyperlinked text
Test Image
How to Add a Video to a Website
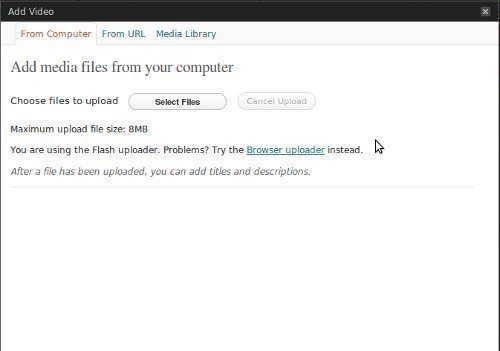
Adding a video to a website is similar to adding any other file to a website. The difference is that the embed process is more complex.
Before doing anything, find out which type of browsers are used by the target audience. HTML tags have changed; therefore, using both the <embed> and <object> tags are important.
The first step is to upload the video to the site. If this will be the only video, upload it to the main directory. Therefore, it’ll look like this:
mydomain.com/movie.avi
The problem with this is that it clutters your main directory. Therefore, it is a good idea to create a /video folder where all videos can be stored. It will keep the server organized, especially if there are multiple videos. Some sites upload hundreds of videos, so they even break it down into a format such as /video-date. Uploading a video to the video folder of your site will look like this:
mydomain.com/video/movie.avi
Now that the video is officially on the server, the next step is to add the video to the website. This is known as embedding. To embed a video, use the following code:
<embed src=”http://mydomain.com/video/movie.avi” autostart=”false” />
This creates a video that will pop up on the website, and to play, the user will have to hit the play button. However, there are other features that can be used. The HTML for this would look like:
<embed src=”mydomain.com/video/movie.avi” width=”300″ height=”250″ playcount=”2″ controller=”true” />
This code will display a video in a 300×250 box with a repeat of 2 times and control over the volume. In a new browser, the code would look like:
<object width=”300″ height=”250″>
<param name=”src” value=”name of video” />
<param name=”controller” value=”true” />
<param name=”autoplay” value=”true” />
This code will create a video with 300×250 with an automatic launch of the video and the ability to control the volume.
Embedding Video from YouTube
The easiest way to embed a video is to upload it to YouTube and then embed that uploaded video. It provides a code to copy and paste into the HTML of a specific file on the website. For example, if one wanted a video on the index page, they’d copy and paste the code onto the index.html page. The reason for doing this is that the video is no longer hosted on one’s own server which can greatly reduce the load on the server. It also ensures that the site doesn’t slow down.
How to Get a Shopping Cart on Your Web Site
One of the benefits of owning a website is the opportunity to sell things. The most important thing is to keep everything organized and make sure it is easy for your potential customers to go from wanting to buy the item to getting the item. Adding a shopping cart to your website is a great way of automating this process.
The first step in adding a shopping cart to your site is to determine which shopping cart you want. Some are very basic and others are very detailed. With that in mind, for a very simple and straightforward process, you can choose the PayPal shopping cart. This allows you to collect credit cards from customers and have it all work through the PayPal system. This way, you don’t have to worry about collecting receipts and dealing with fees to credit card companies.
You can use one of PayPal’s basic buttons or create your own button. Determine the cost of the item. This should include both shipping and sales taxes. Learn more about the rules for sales and taxation in your state.
Put the Add to Cart button next to the image of an item. You are given HTML code, so it’s as simple as pasting it in a different table. Add a “View Cart” button at the bottom/top of your page. When visitors click it, they will be taken to a shopping cart where they will be able to find more information.
The customer will be able to choose how to pay you– using funds on their PayPal or using a credit card–and then they will provide the shipping address. Finally, all of this information is sent to you along with an automatic payment straight to your PayPal. You can then send them the item.
This is just one way of adding a shopping cart to your website. If you want to do this in a different way, you can hire a professional. The method we described works for most small sites.
How to Design a Webpage
Content
The main thing that you should focus on when designing a webpage is the content. Good content is the key to success of any website. It must reflect the reason for the webpage’s existence but it also has to be written in such a way that it can grab the reader’s attention. It is also extremely important to configure your content to fit the needs of SEO (search engine optimization), a process that will help your webpage rank higher in search engines and other web directories.
Layout
A proper layout will allow the reader to access your other webpages without having to look for them. Things like content and ad positions, navigation menus and page structure belong to the overall layout of your webpage.
Homepage
After you have decided how you are going to structure your website, you can start setting up individual pages. The first page that you should create is your homepage as this is the first page that your visitors will see when they come to your website. The homepage should include your most important information such as a brief introduction to your website, top services or products, upcoming events, links to other pages, etc.
About Us
The About Us page is a longer version of the introduction that you placed on your homepage. This page should include at least several paragraphs that will provide more information on the website, why you’ve created it, and the plans for the future.
Contact Page
The Contact Page will allow the website visitors to contact you by using a form. This will make communication easy and simple for both you and your visitors.
Color Schemes
Now that all of your pages are finished, you need to go back through all of your pages and change the colors to be more appealing to visitors. By using a WYSIWYG (what you see is what you get) editor, you can skip the coding process altogether by treating your webpage like a MS Word document. You can use different colors for text, background, and even the scroll bar. You may also be interested in adding a background image to your website rather than just having one color.
Banners
Finally, you should consider adding banners and links to your webpages. Banners will attract more attention to your content, look more professional, and give you the opportunity to make some money by adding someone else’s banner to your site.


Comments - No Responses to “How to Make a Web Page”
Sorry but comments are closed at this time.