
How to Install a Car Audio System
Those on a tight budget and would like to save possibly hundreds of dollars on installation costs and those who would like to customize their car audio system may want to install the car audio system themselves. Whatever the reason, it is quite easy to install a car audio system and here are some tips.
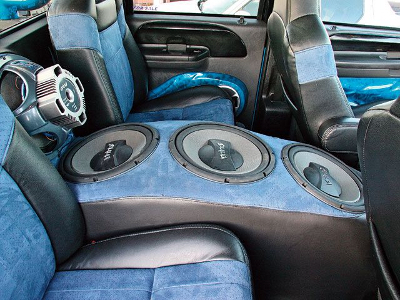
What is a Car Audio System?
Before installing a car audio system, it is best to define what a car audio system is. Usually, a car audio system includes a car stereo, sometimes referred to as a receiver or head unit. Some people define it as not only the car’s stereo receiver but also 2 or more speakers and components that sometimes include an amp and sub woofer. However, for some, a car audio system usually just includes the car stereo receiver.
Choose Car Audio System Components that are Compatible with the Car
Any car stereo receiver and speakers purchased should be compatible with one’s car and should fit comfortably in the spaces allocated for the car audio system. For instance, many cars have small car stereo openings, while others have larger sized openings, sometimes referred to as Double DIN.
When purchasing a car audio system, make sure all components will fit into the car and that any special adapters (called wiring harness) and brackets to fit the specific car’s make and model are purchased.
Remove the Old Receiver
Before being able to remove the old audio system, a few specific tools are needed. They include a few types of screwdrivers, and depending on the installation, a wire stripper, a wire cutter, and electrical tape.
- Once all the tools are acquired, disconnect the negative cable from the car battery.
- Remove the dash board cover, usually with a screwdriver. Once the dashboard cover is removed, access to the receiver is gained. Do not pull out the receiver completely and check which wires are connected to it. Usually, there are three sets of wires – a power cord that goes directly to the car’s battery, an antenna cord that plugs into the back of the receiver and goes to the car’s antenna, and the main receivers wiring harness that connects to the many speakers in the car. (The wiring harness is usually in two parts – one part connects from the receiver, the other part is connected to the car’s speakers. Both of these harnesses plug in together. When disconnecting the wiring harness in the next step, remove the wiring harness that connects with the receiver).
- Now that the installer knows which wires are which, disconnect all three sets of wires. Pull out the receiver completely and remove it.
Install the New Car Audio System
First Install the Car Audio System’s Wire Harness
Most Audio receivers can be purchased with a wiring harness that can fit most vehicles. A wiring harness makes it extremely easy to install an Audio Receiver. The wiring harness makes the connection from the audio receiver to the car’s speakers. All speakers can be connected with literally one snap. The wiring harness connects to the car’s wiring harness with a snap, now making receiver installation possible.
Install the New Car Audio Receiver
Now that the car’s wiring harness is connected to the new car audio receiver harness, the user can easily install the other receiver. First, slide the mounting bracket that came with the new receiver. In some cases, the installer can use the same bracket that the old stereo came with.
- Now bring the receiver as close as possible to the receiver opening in the dash and plug in the receivers’ wiring harness into the back of the receiver. Remember, the other half is already connected to the car’s wires. (Important Note: most cars’ wiring harness includes the power cable. If not, it will be a separate cable, usually red and black together, that needs to be manually connected from the car to the receiver).
- The remaining cable should be the antenna cable. Plug this cable into the back of the receiver.
- Once all wires are hooked up to the car, slide in the receiver, but do not fasten any bolts or put the dash board cover on yet. First, reconnect the negative cable to the car’s battery. The car should start. Once the car has started, turn on the radio and see if everything works properly.
If everything is working properly, screw in the bolts and replace the dash board cover. The audio receiver installation is complete.
Notes
All installations are different, so be sure to read the instructions of both the new receiver and car manual to make sure everything is installed correctly.
Always disconnect the battery when working with car electronics or installing a stereo or any other components.
Additional Reading on Installing Car Audio Systems
|
|
Comments - 4 Responses to “How to Install a Car Audio System”
Sorry but comments are closed at this time.