How to Edit Photos on Google Plus
Google Plus is Google’s new way of offering the latest social networking tools. In Google Plus, users add friends through a different interface that uses “circles” to sort friends by group, priority, and sharing status. Users can upload and create photo albums like Facebook on Google Plus. However, most users have no idea that they can actually edit their photos from Google Plus. Below are instructions on how to edit photos from Google Plus:
1. Log into your Google Plus account by visiting https://plus.google.com/.
2. Open the photos tab in your Google Plus account. The photos tab looks like two little Polaroid pictures in the toolbar on the top middle of the page.
3. Select photos from your circles displayed on the page or your albums on the right top side of the page, or upload a new photo. Click the photo to be edited and click it again to display it in a separate photo viewer (much like Facebook’s photo viewer).
4. On the picture’s bottom left, click Edit Photo.
5. Google Plus will give a few options like rotating or selecting Auto-fix to automatically improve picture quality.
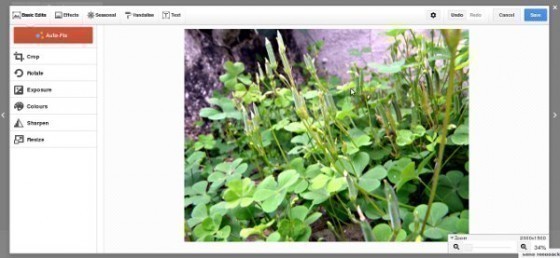
6. Click Creative Kit to access more detailed options.
The options on Creative Kit are extensive. You can change the exposure and colors, sharpen, resize, crop, and more. For more options, you can click Effects to get a variety of effects easily and even make edits like correcting blemishes and adding a “sunless tan” to your skin in photos. In the Seasonal tab, there are options such as adding falling snow during the winter season or Rudolph’s red nose to your face during Christmas. Under the Vandalize tab, you are able to add doodles and speech bubbles to pictures. Under the Text tab, you can add text in a variety of fonts to pictures and select where you want it on the picture.
Google Plus photo editor includes a wide range of options that can help you edit photos by improving the quality and adding personal effects.


Comments - No Responses to “How to Edit Photos on Google Plus”
Sorry but comments are closed at this time.