
How to Disable the Netgear Router Firewall
In most cases, disabling the firewall on a Netgear router is a really bad idea. In fact, it is such a bad idea that Netgear does not even make a button in their GUI that does this.
Nevertheless, users can effectively disable a Netgear router firewall just by adding a rule or two to the firewall configuration.
Netgear Router Firewall Default Rules
Netgear devices with firewalls have two default rules:
- Outbound Services: Allow all access from the inside to the outside.
- Inbound Services: Block all access from the outside to the inside, except responses to requests from the inside.
How to Disable the Netgear Router Firewall
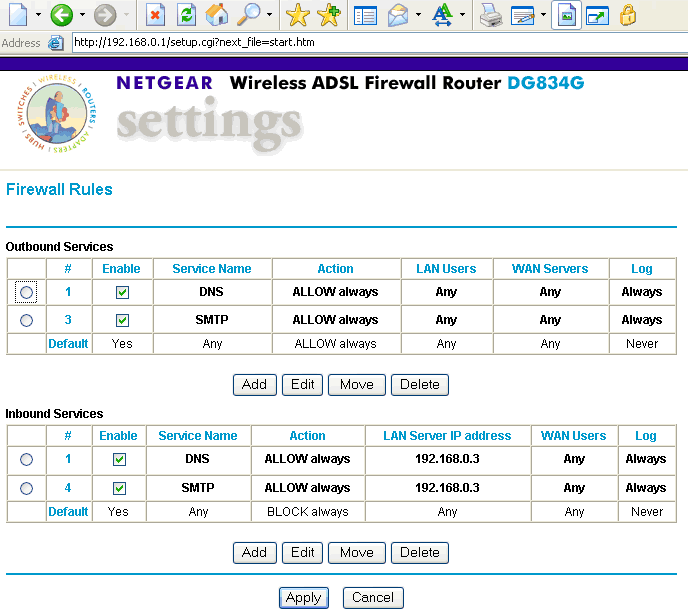
To disable the Netgear Router Firewall, add a new rule that allows all access from the outside to the inside.
To do this, type the router’s address (the default is either 192.168.0.1 or 192.168.1.1) in the Web browser
Enter the username and password in the prompt that appears. The default username is admin and the default password is password.
From the main menu, choose Security -> Rules
Add a new rule for Inbound Services with a service name of “ANY” and an action of “ALLOW always.”
Then, move the new rule up until it is the first rule in the Inbound Services section.
Finally, make certain that this rule is enabled by checking the Enable column.
The Netgear Router firewall is now disabled and the internal network is now completely unprotected and open to attack from the Internet.
|
|
Comments - 39 Responses to “How to Disable the Netgear Router Firewall”
Sorry but comments are closed at this time.