
Configuring Exchange Server 2003 Administrative Permissions
Understanding Exchange Server 2003 Administrative Groups
With Exchange Server 2003, an administrative group is a collection of Exchange Server 2003 objects. Here, Exchange Server 2003 objects are grouped for the intent of delegating permissions and managing permissions.
An administrative group can be created to support different administrative models:
- Centralized.
- Decentralized.
- Mixed administrative model.
The Exchange Server 2003 objects that can exist in an administrative group are listed here:
- System policy objects.
- Server objects.
- Public folder tree objects.
- Routing group objects.
When you install an Exchange Server 2003 organization, the new Exchange Server 2003 organization operates in Mixed Mode. This is the default configuration.
The main characteristics of Mixed Mode are listed here:
- Any Exchange 5.5 sites are mapped to Administrative Groups.
- Administrative Groups features are not supported when running in Mixed Mode.
- You cannot move Exchange mailboxes between Administrative Groups.
- Routing Groups contain only the server installed in the Administrative Group.
Exchange Server 2003 Native Mode has the characteristics listed here: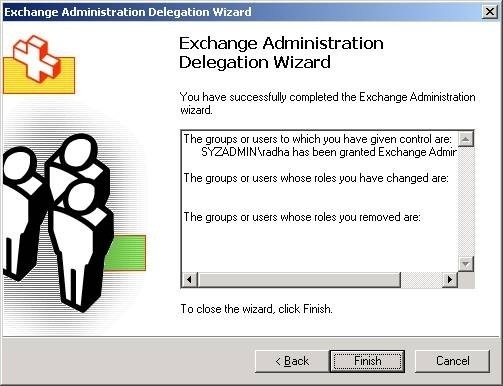
- You can move Exchange mailboxes between Administrative Groups.
- You can also move servers between Routing Groups.
- Routing Groups can contain servers from different Administrative Groups.
- The default enabled routing protocol is SMTP.
Exchange administrative permissions allow administrators to perform Exchange Server 2003 administrative tasks. You can delegate control over an Administrative Group through the Exchange Administration Delegation Wizard.
The different permissions which you can define to delegate control over an Administrative Group are:
- Exchange View Only Administrator; allows the viewing of Exchange objects but not the modification of Exchange objects.
- Exchange Full Administrator; enables the individual to fully administer Exchange system objects and Exchange permissions.
- Exchange Administrator; enables the individual to only fully administer Exchange system information.
To use the Exchange Administration Delegation Wizard, you need the Exchange Full Administrator permissions at the organization level.
How to enable viewing of administrative groups
- Click Start, All Programs, Microsoft Exchange, and then select Exchange System Manager.
- Right-click the Exchange organization and the select Properties from the shortcut menu.
- When the Exchange organization Properties dialog box opens, select the Display Administrative Groups checkbox on the General tab.
- Click OK.
How to create an administrative group
- Open Exchange System Manager.
- In the left panel, right-click Administrative Groups and select New and then Administrative Group from the shortcut menu.
- Provide a name for the Administrative Group.
- Click OK.
- In the console tree, right-click the administrative group that you created and select New and then System Policy Container from the shortcut menu.
- Expand the administrative group and check that the System Policies container was created.
- In the console tree, right-click the System Policies container and select New and then Mailbox Store Policy from the shortcut menu.
- The New Policy dialog box opens.
- Proceed to enable each Property page and click OK.
- Provide name for the new policy.
- Configure the Properties box tabs.
- Click OK.
- Create a Public Store policy.
- Create the Server policy.
How to delegate control over an administrative group
- Open the Exchange Systems Manager.
- Navigate to the Administrative Group folder and expand it.
- Select the administrative group that you want to delegate control of.
- Click the Action menu and select the Delegate Control option.
- The Exchange Administration Delegation Wizard initiates.
- Click Next on the Welcome to the Exchange Administration Delegation Wizard screen.
- Click Add.
- The Delegate Control dialog box opens.
- Click Browse.
- When the Select Users, Computers Or Groups dialog box opens, enter the name of the user and then click Check Names. Click OK.
- In the Role box of the Delegate Control dialog box open, select the Exchange role which should be assigned. Click OK.
- Click Next
- Click Finish.
- Click OK to the warning displayed in the Exchange System Manager dialog box.
- Click Start, Administrative Tools and then click Active Directory Users And Computers.
- When the Active Directory Users And Computers management console opens, expand the domain name and then select Users.
- Right-click the user name that you previously specified and then select Properties on the shortcut menu.
- When the User Properties dialog box opens, click the Member Of tab.
- Click the Add button.
- The Select Groups dialog box opens.
- Enter the appropriate information and then click Check Names. Click OK.
- Click OK in the User Properties dialog box.
How to configure advanced security permissions
- Open the Registry Editor on the Exchange server.
- Navigate to the HKEY_CURRENT_USERSoftwareMicrosoftExchange registry key and expand Exchange.
- Right-click EXAdmin and click New and then DWORD Value.
- Set the New Value #1 to ShowSecurityPage. Press Enter.
- Double-click ShowSecurityPage.
- In the Edit DWORD Value dialog box enter 1 in the Value Data box and then click OK.
- Close the Registry Editor on the Exchange server.
- Click Start, Run and then enter mmc. Click OK.
- Click the File menu item and then click Add/Remove Snap-In.
- When the Add/Remove Snap-In dialog box opens, click the Add button.
- The Add Standalone Snap-In dialog box opens.
- Click ADSI Edit.
- Click Add and click Close.
- Click OK in the Add Standalone Snap-In dialog box.
- Right-click ADSI Edit and then select Connect To on the shortcut menu.
- The Connection Settings dialog box opens.
- In the Select A Well Known Naming Context box, select Configuration.
- Click OK.
- Right-click CN=Administrative Groups and select Properties on the shortcut menu.
- Click Add on the Security tab.
- Enter the user name in the Select Users, Computers, Or Groups dialog box.
- Click OK.
- Click Advanced on the CN=Administrative Groups Properties dialog box.
- The Advanced Security Settings For Administrative Groups dialog box opens.
- In the Permission Entries list, select the user name and click Edit.
- The Permission Entry For Administrative Groups dialog box opens.
- Select the This Object And All Child Objects option in the Apply Onto drop-down list and then click OK.
- On the Advanced Security Settings For Administrative Groups dialog box, uncheck the Allow Inheritable Permissions From The Parent To Propagate To This Object And All Child Objects. Include These With All Entries Explicitly Defined Here checkbox.
- Click OK.
- Click OK in the CN=Administrative Groups Properties dialog box.
|
|
Comments - No Responses to “Configuring Exchange Server 2003 Administrative Permissions”
Sorry but comments are closed at this time.