
Monitoring Exchange Server 2003
Monitoring Exchange Server 2003 Server Daily
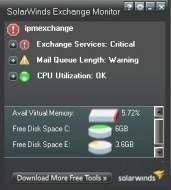
To ensure that your Exchange Server 2003 environment is operating and operating optimally, you have to monitor your Exchange Server 2003 server services daily. You have to monitor performance, and recognize and eliminate bottlenecks if you want to have a system that is optimized. You can use System Monitor, Task Monitor, Network Monitor, Event Viewer, and Performance Logs And Alerts to monitor the system. You can use System Monitor and Performance Logs And Alerts to create baselines, identify bottlenecks, determine performance trends, and test any configuration changes. Windows Server 2003 and Exchange Server 2003 each provide tools and utilities that can be used to monitor a system.
It is recommended to draw up a thorough server monitoring plan once you have established your baseline performance metrics for a server. A few elements that should be incorporated into a server monitoring plan are:
- Identify those server events which should be monitored.
- Determine and set up monitors and alerts to inspect the events.
- Determine whether filters are necessary to reduce the quantity of monitoring information which you want to collect and then configure any necessary filters.
- Establish a logging strategy to log event data that should be analyzed. Alternatively, you can monitor and analyze server activity when it occurs.
- View and analyze data collected by events in the Performance console.
There are a number of daily maintenance tasks that should be performed to ensure that your Exchange Server 2003 environment is running:
- Monitor for errors and warning events using the Event Viewer tool.
- Check logs generated by the following:
- Event Viewer.
- Virtual servers.
- Performance console.
- Anti-virus software.
- Monitor Windows Server 2003 server and Exchange Server 2003 server performance. You can use the Performance console to do this.
- Check the Exchange Server 2003 server status.
- Check the connector status.
- Check whether the volumes on which Exchange Server 2003 is located has sufficient available free disk space.
- Monitor all services required for Exchange Server 2003 and Windows Server 2003 to run.
- Check Active Directory replication. You can use the Active Directory Sites And Services management console to perform this check.
- Monitor failover in the Exchange cluster. You can the Cluster Administrator management tool to do this.
- Check that the online backup job of the Exchange Server 2003 server performed the previous evening has completed successfully.
- Check Exchange Server 2003 store statistics. Use the Exchange System Manager tool to view these statistics.
- Check whether there are messages stuck in the messaging queues. You can use Queue Viewer to verify that messages are not stuck in the SMTP message queue, Connector queue, and MTA messaging queue.
Using Event Viewer to monitor Exchange and Windows Activities
Event Viewer is used to monitor events that took place on a computer. Event Viewer stores events that are logged in a system log, application log, and security log. The system log contains events that are associated with the operating system. The application log stores events that pertain to applications running on the computer. Events that are associated with auditing activities are logged in the security log. This makes Event Viewer a good mechanism to monitor for, and troubleshoot problems.
To open Event Viewer
- Select Start, Select Administrative Tools, and then select Event Viewer.
- Simply click the Event log you would like to examine.
Event Viewer logs list five different event types:
- Information events tell you when a particular activity occurs, such as starting the system.
- Warning events typically point out problems that could possibly occur.
- Error events indicate an actual error that occurred. These are basically your critical events.
- Success Audit events signifies a particular event that has been audited for success
- Success Failure events signifies a particular event that has been audited for failure
The application log in Event Viewer is used by Exchange Server 2003 to record error events, warnings, and information events.
A few normal Exchange Server events are listed below. These are events that occur during the normal operation of Exchange Server 2003:
- Event ID 700 – ID 701: Indicates that online defragmentation has started/completed.
- Event ID 1206 – 1207: Indicates that a cleanup of items past retention date for item recovery has started/completed.
- Event ID 1221: Indicates how much megabytes of free space exist after an online defragmentation has ended.
- Event ID 9531 & Event ID 9535: Indicates that cleanup of deleted mailboxes that are past the retention date has started, or that cleanup is complete.
A few abnormal Exchange Server events are listed here. These are events which indicate that Exchange Server is having some sort of problem:
- Event ID 1018 & Event ID 1022: Indicates Joint Engine Technology (JET) error events which could point to file damage to the Exchange database.
- Event ID 2064 & Event ID 2069: Indicates Directory service access problems due to incorrect configuration of DNS.
- Event ID 9582: Indicates low/fragmented virtual memory.
With reference to Exchange Server 2003 and monitoring events in Event Viewer, it is recommended that you regularly monitor the following event sources:
- MSExchangeTransport event source: Use this event source to monitor and view events which were written when using SMTP to route messages.
- MSExchangeIS event source: Use this event source to monitor and view events pertaining to the service that enables access to the mailbox and public folder stores.
- MSExchangeAL event source: Use this event source to monitor and view events pertaining to the service that addresses e-mail using the address lists.
- MSExchangeSA event source: Use this event source to monitor and view events which were written when using Active Directory to store directory information.
Using Queue Viewer to Maintain and Manage Messaging Queues
Queues are used by Exchange Server 2003 to store and hold messages as they are busy being routed and delivered. The Queue Viewer utility is found in the Exchange System Manager Administration tool. You can use Queue Viewer to maintain and manage your Exchange organization’s messaging queues. You should monitor the queues that Exchange Server 2003 uses daily.
You can view information on the following queues on a local computer or remote computer:
- SMTP virtual server queue.
- Connector queue.
- Microsoft message transfer agent (MTA) object queue.
- DNS messages pending submission.
- Messages which are queued for deferred delivery.
- Failed message retry queue.
The options that are available, which you can use in the Queue Viewer utility are:
- Disable Outbound Mail option.
- Find Messages option.
- Settings option..
To determine whether a queue has an existing problem, you have to list messages in that particular queue. This is done by accessing the Queue Viewer utility in Exchange Server 2003, selecting the queue and then using the Find Messages option. The State column shows the state that th queue is currently in.
The different message states are listed here:
- Active state: Indicates that the queue has a current active connection – you need not perform any additional action.
- Ready state: Indicates that the queue is currently available and ready to have a connection assigned – you need not perform any additional action.
- Scheduled state: Indicates that the queue is currently waiting for a scheduled connection – you need not perform any additional action.
- Remote state: Indicates that the queue is currently waiting for a remote dequeue command – you need not perform any additional action.
- Retry state: Indicates that the connection attempt has failed. The server is currently waiting for another retry. Here, you should monitor the item later to see whether the state has changed. If the state has not changed, you should start to try and determine what the issue is.
- Frozen state: Indicates that no messages are able to exit the queue. When the Exchange routing categorizer is still running, messages can be added to queue.
How to configure diagnostic logging
When enabled, diagnostic logging records events pertaining to connections, authentication, client action, and configuration.
By default, the logging level is set to None. This basically means that only critical events and error events are recorded. Diagnostic logging is recorded by the Windows Server 2003 event log on the Exchange server on which the virtual server resides.
To configure diagnostic logging:
- Open Exchange System Manager.
- Locate the Exchange server that you want to configure.
- Right-click the Exchange server and select Properties from the shortcut menu.
- Click the Diagnostics Logging tab.
- In the Services area of the tab, click service.
- Select the appropriate entry in the Category area of the tab.
- Select between the following logging levels:
- None; only critical events and error events are recorded.
- Minimum; one entry is logged for each key task performed by the service.
- Medium; for each action needed to execute a task, entries are logged.
- Maximum; entries are logged for each line of code. The Maximum logging level should be enabled only when you need comprehensive debugging information. This is due to the impact this logging level has on server performance.
- Click OK.
- To view logged information, access Event Viewer.
How to define events to monitor using the Monitoring And Status utility
The Monitoring And Status utility is found within the Exchange System Manager tool. You can use the Monitoring And Status utility to define monitoring levels for the services and resources running on your Exchange Server 2003 server. Using the Monitoring And Status utility, you can monitor both your Exchange Server 2003 servers and connectors. The Monitoring And Status utility does though monitor the main Exchange Server 2003 services by default.
To determine whether an Exchange Server 2003 service has failed, check the information in the Status column in the Monitoring And Status utility.
The different server status levels are listed here:
- Unreachable server status: Indicates either of the following events:
- The main Exchange services on the server are down.
- The connector between the routing groups may be down or non-existent.
- Unknown server status: The System Attendant service is unable to communicate with the server.
- Unavailable server status: A communication service is down on the connector.
- Critical or Warning server status: A resource that is defined for monitoring, has reached the critical or warning state specified for the particular resource.
To define events to monitor using the Monitoring And Status utility:
- Open Exchange System Manager.
- Expand the Tools node, and then expand the Monitoring And Status node.
- Click Status.
- In the details pane, check whether the server and connectors have Unreachable, Unknown, Unavailable, or Critical or Warning server status.
- Double-click the Exchange server.
- On the Monitoring tab, click Add.
- The Add Resource box opens.
- Select the Available Virtual Memory option and click OK.
- On the Virtual Memory Thresholds dialog box, define the threshold for virtual memory and click OK.
- On the Monitoring tab, click Add once more.
- When the Add Resource box opens, select the CPU Utilization option and click OK.
- On the CPU Utilization Thresholds dialog box, define the threshold for CPU utilization and click OK.
- Proceed to specify SMTP queues growth and X.400 growth thresholds.
- Proceed to specify free disk space thresholds.
- Click Add and then select Windows 2000 Service and click OK.
- When the Services dialog box opens, use the When Service Is Not Running Change State To drop-down menu list to select Critical, and then click Add.
- Choose Microsoft Exchange Information Store. Click OK.
- In the Name box of the Services dialog box, enter the name of Information Store and click OK.
- Click OK.
Using the Performance Console to monitor Exchange Server
The Performance console can used be to collect and view performance objects and counters’ information.
The Performance console contains the following tools:
- System Monitor: The System Monitor utility is the main tool for monitoring system performance. System Monitor can track various processes on your Windows system in real time. The utility uses a graphical display that you can use to view current, or log data. You can determine resource usage by monitoring trends. System Monitor can be displayed in a graph, histogram, or report format. System Monitor uses objects, counters and instances to monitor the system.
An object can be described as a collection of counters that is associated with a system resource or service which produce the data you can assess. When an object executes a function, its associated counters are updated. A counter can be regarded as a data reporting component in an object. The counter represents data for a particular component of the system or service. Each object therefore has a set of counters that track particular information on the performance object. An instance refers to the incident of multiple performance objects of the identical type on a computer. An object can have one or multiple instances.
To use System Monitor, you must be a member of the Administrators group, the Server Operators group, the Performance Log Users group, or the Performance Monitor Users group. To start System Monitor, click Start, Administrative Tools, Performance, and select System Monitor. To add counters in System Monitor, you can click Add Counters to display the Add Counters dialog box.
The System Monitor Properties dialog box consists of five tabs that are used to configure and manage System Monitor properties. Click the Properties button available on the System Monitor Toolbar to configure System Monitor properties.
A few key activities that can be performed using System Monitor and the main features of System Monitor are listed below:
-
- View and monitor real-time performance data or view data from a log file.
- Choose which data you want to collect by selecting between various objects and counters.
- Collect data from multiple computers simultaneously.
- Choose theformat or view in which you want to examine collected data (Graph view, Report view, Histogram view).
- Monitor processes and components that you want to optimize.
- Monitor the results of your optimization efforts.
- View trends in workloads and the effect being realized on resource usage.
- Plan for upgrades.
- Performance Logs And Alerts: By using the Performance Logs And Alerts tool included in the Performance console, you can track the performance of the server by creating counter logs, trace logs, and defining alerts.
- Counter Logs: Counter logs collect data on the selected counters once a predefined interval has passed. A few features of counter logs are listed below:
- Collect performance data on the activities of system services.
- Collect performance data on hardware usage.
- Manually log data.
- Schedule data logging to both commence and stop automatically
- You can view collected data via System Monitor.
- Export collected performance data to a database or spreadsheet.
- Trace Logs: Trace logs differ to counter logs in that trace logs monitors data constantly and then records performance data when a specific event occurs. The collected data is written to a trace log file.
- Alerts: You can configure alerts to be generated when a predefined counter reaches, exceeds or falls beneath a defined threshold or value. When you configure alerts, you can specify that the following actions occur when an alert condition is met:
- A message is sent to a user through the Windows Messenger service.
- A log file is created.
- An application or program is executed.
- Counter Logs: Counter logs collect data on the selected counters once a predefined interval has passed. A few features of counter logs are listed below:
To determine normal system behaviour and then determine what changes can be made to improve system performance, you have to create and configure a Performance console. A few recommendations for performing this are listed here:
- Start by creating a Performance console that has two different sample times, one for a 24-hour view and one as short as 10 seconds.
- In the Performance console, include the following counters (at a minimum):
- MemoryPages/sec
- Processor(Total)% Processor Time
- Process(store)% Processor Time
- MSExchangeISRPC Requests
- MSExchangeISRPC Operations/sec
- PhysicalDisk(Total)Disk Transfers/sec
- SMTP ServerLocal Queue Length
- SMTP ServerMessages Delivered/sec
- MSExchangelS MailboxLocal Delivery Rate
- MSExchangelS MailboxFolder Opens/sec
- MSExchangelS MailboxMessage Opens/sec
- Examine the server being used the most to determine if there are any performance issues which you can resolve.
- Save all reference log files so that you can use them again at a later stage.
How to select the counters you want to monitor
- Under the Administrative Tools menu, select Performance to open the Performance console.
- In the left pane, select System Monitor.
- To view current activity, click the View Current Activity button on the Performance Monitor toolbar.
- To add the counters which you want to monitor, click the Add button on the Performance Monitor toolbar.
- The Add Counters dialog box opens, displaying a number of fields.
- If you want to monitor the local computer, click the Use Local Computer Counters option.
- If you want to monitor a different computer, click Select Counters From Computer, and choose the server which you want to monitor.
- Select the type of performance object you want to work with from the Performance Object drop down list.
- If you want to monitor each counter associatedwith the particular performance object, select the All Counters option.
- If you want to choose specific counters, choose the Select Counters From List option and proceed to select the counters.
- If you want to monitor all counter instances, click the All Instances option.
- If you want to select specific counter instances, click the Select Instances From List option and then choose the counter instances to monitor.
- Click Add to add the counters for the performance object.
- Click Close after you have added all the counters which should be tracked.
Using Protocol Logging to Monitor Mail System Protocols
If you want to monitor and troubleshoot mail system protocol issues then you should enable and configure protocol logging. Protocol logging provides information on the message commands that a user sends to an Exchange Server 2003 server.
The following Internet protocols can be configured to track the message commands that a user sends to an Exchange Server 2003 server.
- SMTP
- NNTP
- HTTP
You can configure the logging format that should be used for logging the information:
- ASCII-based format: The different ASCII format options which you can choose between are:
- Microsoft IIS log file format.
- NCSA log file format.
- W3C Extended log file format.
- Open Database Connectivity (ODBC) format: For the ODBC format, you have to configure which ODBC database to use, and then configure the database to receive protocol logging information. You can use Access or SQL Server to create an ODBC database.
How to configure protocol logging for an SMTP virtual server
- Open Exchange System Manager.
- Expand the Administrative Groups node, the administrative group, the Servers node, Server Name, Protocols.
- Expand the SMTP folder.
- Right-click Default SMTP Virtual Server and then select Properties.
- The Default SMTP Virtual Server Properties dialog box opens.
- Select the Enable logging checkbox on the General tab.
- Choose between of the following logging format options available in the Active Log Format drop-down list: Microsoft IIS Log File Format, NCSA Common Log File Format, ODBC Logging, or W3C Extended Log File Format.
- Click Properties.
- The Logging Properties dialog box opens.
- In the New Log Schedule area of the General tab, choose either of the following options: Hourly, Daily, Weekly, Monthly, Unlimited File Size, or When File Size Reaches option and set the size setting.
- In the Log File Directory box of the General tab, set the log file location.
- If you have selected the W3C Extended Log File Format option, then you can click the Advanced tab to configure the items which should be tracked.
- Click OK in the Logging Properties dialog box.
- Click OK in the Default SMTP Virtual Server Properties dialog box.
Defining Storage Limits for Mailboxes
To configure storage limits for a mailbox:
- Open the Active Directory Users And Computers management console.
- Select the appropriate user account object.
- Right-click the user account object, and select Properties from the shortcut menu.
- Click the Exchange General tab.
- Click Storage Limits.
- The Storage Limits dialog box opens.
- Uncheck the Use Mailbox Store Defaults checkbox so that you can configure your own mailbox storage settings.
- If you want to send a warning to the user when the user’s mailbox reaches the storage limit, enable the Issue Warning At (KB): checkbox and specify the appropriate value.
- If you want force the user to clean up a mailbox that has ignored an issued warning, enable the Prohibit Send At (KB): checkbox and then specify thedesired value.
- If you want to force the user to clean up a mailbox in order to receive/send new messages, enable the Prohibit Send And Receive At (KB): checkbox and set the appropriate value for the option.
- Uncheck the Deleted Item Retention checkbox if you want to define your own Deleted Item Retention settings.
- Click OK.
To configure storage limits for a mailbox store:
- Exchange System Manager.
- Locate the specific mailbox store that you want to define storage limits for.
- Access the properties of the mailbox store.
- Click the Limit tab.
- Define the desired storage limit settings for the mailbox store using the following:
- Enable the Issue Warning At (KB): checkbox and specify the appropriate value for the option.
- Enable the Prohibit Send At (KB): checkbox and then specify the desired value for the option.
- Enable the Prohibit Send And Receive At (KB): checkbox and set the appropriate value for the option.
- Specify when Exchange Server 2003 should send warnings to mailboxes which have reached storage limits.
- Define the desired deletion settings for the mailbox store using the following textboxes:
- Keep deleted items for (days)
- Keep deleted mailboxes for (days)
- Click OK.
|
|
Comments - No Responses to “Monitoring Exchange Server 2003”
Sorry but comments are closed at this time.