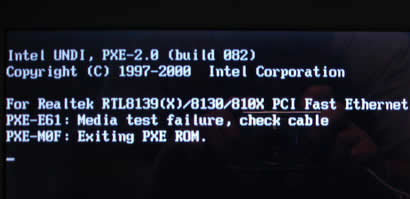
How to Solve “PXE-E61 Media Test Failure, Check Cable” Error
PXE (Preboot eXecution Environment) is a boot environment that Intel created. The PXE allows a workstation to boot up by using a network interface before it boots the operating system from the local storage devices such as the hard disk.
When hard disk boot failure occurs, the computer will not boot up and a message saying “PXE-E61: Media Test Failure, Check Cable” appears. The error may also read “PXE-M0F: Exiting Intel PXE-ROM” or “Boot Failure: System Halted.” This error message repeats each time one attempts to start up the computer and it restricts one’s access to the hard disk data.
Hard disk boot failure in PXE can happen for several reasons. The most common reason is physical hard disk failure due to a faulty or improperly connected hard disk. The error might also occur if a computer attempts to boot from a device and it cannot find the necessary boot files. The error can also appear because of incorrect BIOS (Basic Input/Output System) or CMOS (Complementary Metal Oxide Semiconductor) settings. The BIOS contains instructions about how the computer boots. The BIOS can only be updated or modified with BIOS updates. The CMOS contains the system settings and a CMOS battery powers it. The CMOS can be changed or modified by entering the CMOS setup.
The setup for the BIOS and CMOS are the same, but the BIOS and CMOS on the motherboard are not the same. Below are steps to access the BIOS and CMOS to help solve the error.
How to Find the Cause and Fix “PXE-E61 Media Test Failure, Check Cable” Error
It is important to isolate the cause of the “PXE-E61 Media Test Failure, Check Cable” error and solve it. To do this, follow the steps below:
- A loose or improper hard disk cable connection can be the cause of the error. This typically happens if the hard disk has recently been installed or moved. Check all of the hard disk’s cable connections before trying anything else to solve the error.
- Make sure that no other storage device is connected to the computer. If there is a storage device connected, remove it.
- When computer start up is being attempted, enter the BIOS to see if the hard disk has been set up correctly and detected in BIOS. To enter the BIOS, follow these steps:
a. The key that must be pressed to enter the BIOS varies depending on the computer model. The key is most likely the Del key or one of the F keys. Many computers refer to this as Entering Setup and Setup is just another term used for the BIOS.
b. Try setting one’s BIOS to any safe default settings. That might fix the error.
- Verify that the boot options in CMOS are setup correctly. Follow these steps to do this:
a. Enter the CMOS by pressing one of the following keys: F1, F2, Del, Esc, or F10. Press one of these keys when trying to start up the computer. If these keys do not work, try holding one or more keys on the keyboard when the computer is booting. This may cause a Stuck Key Error, which should allow the user to enter the setup.
b. If the CMOS setup shows an option to boot from the LAN, disable this option.
c. Try to set the CMOS settings to any safe default settings, then save and exit. After changing any settings, reboot the computer.
- It is possible that physical failure caused the error if the hard disk cannot be detected. If this is the case, replace the hard disk and restore one’s data if a good backup is available. If one does not have a good backup, contact a company that provides data recovery services. These companies perform hard disk recovery and securely retrieve one’s valuable data.


Comments - One Response to “How to Solve “PXE-E61 Media Test Failure, Check Cable” Error”
Sorry but comments are closed at this time.