
USB Device Not Recognized
A common problem that arises for computer users is dealing with the USB Device not recognized error. This error is thrown after an electronic device is connected to the computer or USB hub but is not automatically detected. When the error occurs, the Windows Device Manager may also list the component as an “unknown device” depending on the nature of the error. Although more commonly encountered on Windows computers, Mac OS X users can also experience the equivalent error when connecting new or legacy peripheries to their computer(s).
What Are the Common Causes of the USB Device Not Recognized Error?
There are several factors that can contribute to the USB device not recognized error. These include:
The computer does not support USB 2.0 or USB 3.0
Incorrect USB drivers installed on the computer
A malfunction in the host controller hardware has occurred
Attached devices or hubs may have created the conflict
Host controller hardware malfunction
Additional system hardware or configurations that may change the timing of the device.
Methods to Correct the USB Device Not Recognized Error
Some of the common methods to use to correct issues with a USB device not being recognized include: initiating recognition of the USB device using the Windows Device Manager, disabling power management of the USB hub, restarting the computer, conducting a system file check, checking for loose connections, and running the Windows System Restore utility. All of the methods can be attempted by end-users who have administrator privileges on their computer without having to pay a computer professional to troubleshoot the error.
Steps to Initiate Recognition of the USB Device by the Device Manager
Step 1 – Unplug and then plug the USB device back into your computer.
Step 2 – Select the “Start” menu button and enter “Devmgmt.msc” in the search text field followed by pressing the “Ok” button on the computer’s keyboard. On older versions of Windows, you will need to select the “Run” menu button after “Start” to enter the command.
Step 2 – Click on the Device Manager window to select the computer you are using as the location for the hardware scan.
Step 3 – Click the “Scan for hardware changes” on the “Action” menu.
Step 4 – Wait for the scan to complete. Windows will display a message similar to, “Windows XP recognizes the new device” if the Device Manger has been successful in correcting the USB device not recognized error.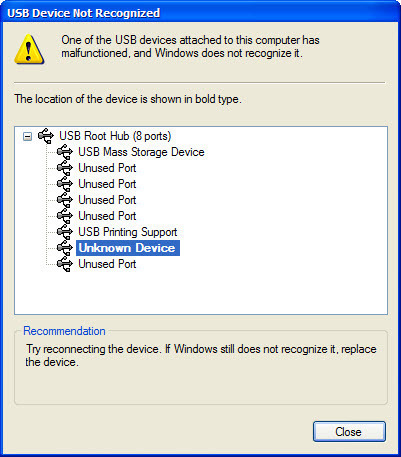
Disable Power Management of the USB Hub
Step 1 – Reseat the USB device in the computer by unplugging and plugging back into the USB port.
Step 2 – Select the “Start” menu button and enter “Devmgmt.msc” command in the search text field followed by clicking the “Ok” menu button to launch the Windows Device Manager.
Step 3 – Expand the Universal Serial Bus controllers menu option. Then, right-click a USB Root Hub on the listing and choose the “Properties” menu option. This action will display the USB Root Hub Properties dialog menu box.
Step 4 – Choose the “Power Management” menu tab.
Step 5 – Select the menu option to allow the computer to turn off this device to save power check box. Click the “Ok” menu button.
Step 6 – Repeat steps 3 through 5 for each USB hub listed in the application.
Step 7 – Select the “Scan for hardware changes” menu choice on the “Action” menu.
Step 8 – If the USB device error has been fixed, Windows will display a message that it recognizes the new device.
Restart the Computer to Recognize the USB Device
A method commonly overlooked when troubleshooting a USB device error is to restart the computer to force the Operating System to recognize the device.
Step 1 – Unplug the USB device.
Step 2 – Restart the computer. Wait about 10 seconds after the computer has completed the restart.
Step 3 – Plug the USB device into the hub or computer.
Step 4 – If successful, Windows will display a message that the device is now recognized.
Fix Errors Using Windows System File Check
If the USB device has previously worked on your computer, there is a possibility that a configuration file has become corrupted. The Windows System File checker can be used to identify and correct corrupted files.
Step 1 – Select the “Start” menu button followed by choosing the “All Programs” and “Accessories” menu options.
Step 2 – Right click the “Command Prompt” and choose the “Run as Administrator” menu option.
Step 3 – Select the “Continue” menu button. Some configurations of the Windows OS will require that you enter the administrator login and password on this step.
Step 4 – Enter “sfc /scannow” in the command prompt window followed by pressing the “Enter” key.
Step 5 – Windows will initiate a full scan of the computer. The following message will be displayed to indicate the scan status:
Beginning the system scan. This process will take some time.
Beginning verification phase of system scan.
Verification XX % complete
Step 6 – View the Windows System File Check results after the scan has completed on the screen. The application will either: 1 – find no integrity violations, 2 – find corruption(s) and repair them, or 3 – find corruptions and fail to repair them. The results of the scan will also be saved to the CBS.log file that is stored in the %windir%\Logs\CBS folder.
Step 7 – Restart your computer if errors were discovered and repaired and the USB device not found error should be corrected.
Use System Restore to Fix the USB Device Not Found Error
If the USB device has previously worked on the computer, Windows System Restore can be used to restore the operating system to a previous condition. For this method to work, a Restore Point will have to be selected prior to the issues with device recognition occurring.
Step 1 – Select the “Start” menu button followed by the “All Programs,” “Accessories,” and “System Tools” menu options.
Step 2 – Click the “System Restore” menu choice followed by the “Continue” menu button. Windows may require you enter the administrator login and password for the computer before you can select the “Continue” button.
Step 3 – Select the “Choose a different restore point” menu option followed by clicking the “Next” menu button.
Step 4 – Choose a date and time prior to the issues being experienced with the USB device. If it has been greater than 5 days since you have had the problems, you will need to select the “Show restore points older than 5 days” check box.
Step 5 – Continue with Windows System Restore and restart your computer if it does not do so automatically.
Step 6 – Insert the USB device after computer restart and it should now be recognized.
**Note: Use System Restore with caution. If you have installed any computer programs, updates, or made major configuration changes to the computer since the restore point you choose they will be lost. Personal files, documents, emails, and photos will not be affected through using the System Restore application.
Disable USB Hub Power Management
If you are using a USB hub, the power management utility can interfere with the proper operation of a USB device. Disabling this feature can fix the USB device not found error in some cases.
Step 1 – Select the “Start” menu button and enter “devmgmt.msc” in the search text field followed by clicking the “Ok” menu button.
Step 2 – Expand the “Universal Serial Bus Controllers” menu node.
Step 3 – Right click the “USB Root Hub” menu item and then click the “Properties” menu choice.
Step 4 – Select the “Power Management” menu tab. Then, clear the “Allow the computer to turn off this device to save power” check box followed by clicking the “Ok” menu button.
Step 5 – Restart the computer and the error should be corrected. Note that if the procedure is accomplished on a laptop the battery life will be reduced.
Remove the Computer from the Power Supply
If you do not have time to take the basic troubleshooting steps to fix the USB device not found error, or they do not work, a quickfix that you can attempt is unplugging the power supply from a laptop.
Step 1 – Unplug or remove your computer from its power supply. (note these steps are for laptops).
Step 2 – Remove the USB device from the computer.
Step 3 – Turn off the computer using the power button or the “Shut Down” command found by selecting the “Start” menu button or pressing the “CTRL” + “ALT” + “DEL” keys simultaneously.
Step 4 – Restart the computer. Insert the USB device after the computer has restarted to correct the USB device not found error.
USB Device Not Recognized on a Mac
Although the USB device not recognized is a common error that is seen on computers that run the Windows OS, it can also be encountered on those running Mac OS X. Since Mac OS 9, Apple has designed the OS to not require special drivers to detect USB devices which helps minimize the issues previously seen with external peripheries on the OS; however, this has still not proven to be full-proof against errors arising. The steps to troubleshoot the error on a Mac are similar to those taken on a Windows computer.
Step 1 – Ensure the connection between the device and USB port is secure. Remove the device throwing the error from the computer’s USB port and then plug it in again. The connection should be secure, but take care not to force the connection as damage to the port could result.
Step 2 – Remove other devices that are connected to the computer via USB ports. After removing all accessories, start plugging them in one at a time. Ensure the device is recognized and functioning properly before moving to the next device. Sometimes on Mac OS X computers, two devices will interfere or conflict with each other. If you discover this is the case on your computer, you will have to deconflict usage of the two devices and seek software fix(es) from the respective device manufacturer(s).
Step 3 – Determine if the USB device that is throwing the error is new or one that you have had for a while which has stopped working. If it is a legacy device, the error(s) are likely resulting from new software or computer configuration changes. If you have recently installed a new application on the computer, consider uninstalling the program to see if there is an incompatibility with the USB device. If the issue is with a new periphery, visit the manufacturer’s website to see if there is new software to install to help correct the problem.
Step 4 – Check the device status in the System Profiler. The Mac OS X System Profiler can be found by opening the “Applications” and “Utilities” folder. Once launched, select the “Contents” column then the “USB” menu option beneath the “Hardware” menu header. If the device is displayed in the “System Profiler” the issue is likely due to software incompatibilities. This will require updating the software drivers, reinstalling the system software, or creating a new computer user to resolve. If the device does not display in the System Profile, the issue has likely occurred with the hardware.
Step 5 – If the USB device that is throwing the “not recognized” error is plugged into the computer’s keyboard or a USB hub, remove it. Then, plug the device directly into one of the computer’s USB ports. If the device now works, the hub or keyboard ports are likely not providing sufficient power to the device.
Step 6 – Take a working USB device and test each USB port on the computer. Many times, one or more of the USB ports on a computer will stop functioning. If this is the case, it could be a sign that the computer needs servicing, but will help you understand if you have issues with the USB device or the computer.
Step 7 – If the USB device has an external power cord, reseat it. This means that you need to unplug and replug the external cord into the power source. Sometimes, there can be issues with the wall socket or power strip being used, so also change the source of power that the cord is using for the test.
Step 8 – Verify the USB device is mounted properly. To do so, select the “Hard Disk” and then “Applications” menu options. Click the “Utilities” and “Disk Utility” menu options. Highlight the name of the USB device. If the display indicates “Mount on top,” click the “Mount” menu options sot that it changes to unmount. Then, remount the device as required.
|
|
Comments - 34 Responses to “USB Device Not Recognized”
Sorry but comments are closed at this time.