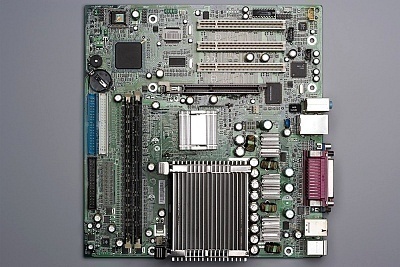
How to Identify a Motherboard
Computer users who intend to own their computer for a prolonged period of time should be able to identify the computer’s motherboard in order to conduct upgrades. The motherboard type affects computer BIOS upgrades, new CPU installations, and determines the maximum amount of RAM that the motherboard supports. A computer’s motherboard can be identified in the following ways: visually, from the BIOS, and from the BIOS string. Once the motherboard is identified, compatible upgrade components should be installed on the computer.
How to Identify a Motherboard through Visual Inspection
Step 1 – If purchasing a motherboard from a store, inspect the box containing the board. The packaging indicates the model, with desktop motherboard models typically starting with the letter “D.”
Step 2 – If the motherboard is not packaged or is already installed, search for a small bar code label on Intel desktop boards. These boards have the letter “D” on the bar code right before the model type designation. 
Step 3 – Search the motherboard for the identification markings if not readily found. These markings are typically between PCI slots, the space around slots on the board, near the corners, or underneath the motherboard.
Step 4 – Remove the motherboard and continue checking underneath it if required. The model number is normally seven or eight digits (similar to D975XBX2) if designed as a desktop computer motherboard.
How to Identify a Motherboard from the BIOS
Step 1 – Restart the computer and press the “F2” key to open the computer’s BIOS.
Step 2 – Select the “Main” menu option once the BIOS interface is loaded on the computer screen.
Step 3 – Click “Additional Information.”
Step 4 – View the entry next to the “Product Name” label, which identifies the motherboard model.
How to Identify a Motherboard from the BIOS String
The BIOS string identification method can be used on traditional Intel boards on functional computers.
Step 1 – Start the computer normally.
Step 2 – Press the “Esc” key when the Intel logo is displayed on the computer screen.
Step 3 – View and note the BIOS code subsequently displayed on the computer screen.
Step 4 – The BIOS code displayed is a three or four number series separated by the “.” symbol. The numbers and letters that precede the first period are the motherboard’s model number. If the final string of letters and numbers starts with “CS,” then the model identification is the last string of text.


Comments - 4 Responses to “How to Identify a Motherboard”
Sorry but comments are closed at this time.