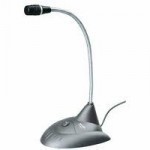
How to Setup a PC Microphone
With the increased use of applications featuring live video chat options such as Google Talk, Skype, and Yahoo IM, setting up a PC microphone is now an essential task to ensure the highest quality of service while using these and other related products. Although most versions of the Windows OS are designed to automatically detect and auto-configure a microphone, to ensure optimum performance the device must be configured to minimize the effects of background noise on the quality of sound transmission.
How to Set Up a PC Microphone
Step 1 – Locate the input jack for the microphone on the computer. On older desktops, the input jack is located on the rear of the hard drive tower and is pink or red. On newer computers (including laptops), the plug is on the side or front of the computer and may or may not have the red color around the jack. Most have an image of a microphone beside the plug.
Step 2 – Insert the microphone plug into the jack. If using a combined microphone and headset, there is a separate plug for the microphone from the headset to plug into the computer jack.
Step 3 – Choose the “Start” menu button then choose the “Accessories” menu choice.
Step 4 – Select the “Entertainment” menu option and then choose the program icon labeled “Volume Control.”
Step 5 – De-select any boxes labeled mute and ensure the volume on the microphone is turned up.
Step 6 – Select the “Sound Recorder” menu option under the “Entertainment” menu.
Step 7 – Choose the “Record” menu button and speak into the computer’s microphone then click the stop button. If the recording plays without any issues, the setting up the PC microphone is complete.
Step 8 – If the sound check is unsuccessful, open the Windows “Control Panel” and select the “Sounds” and “Audio Devices” menu options.
Step 9 – Select the “Audio” menu tab, choose the “Sound Max Audio” menu option, then choose the “Apply” menu button.
Step 10 – Repeat the sound check. Setting up the PC microphone is now complete.


Comments - No Responses to “How to Setup a PC Microphone”
Sorry but comments are closed at this time.