How to Download Music to an iPod
Downloading songs to an iPod is very simple. Prior knowledge of iTunes is essential to download songs to iPod player. Users can either purchase them or search for the sites that give the tunes for free. Below is an easy-to-follow procedure for downloading the songs to an iPod.
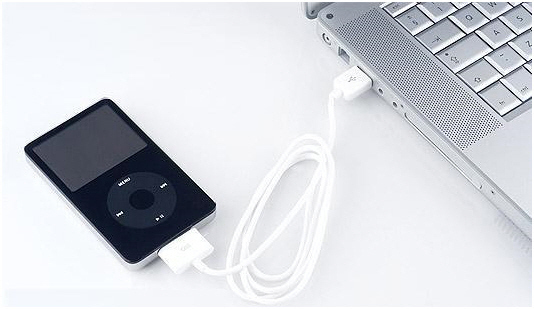
- Connect the iPod player to the computer via USB connector/port. However, if connecting for the first time, iTunes should prompt the user to automatically sync his/her iPod when connected.
- Install ITunes on the computer if it is not yet installed. Either download iTunes software (which is free from Apple) or install it from an installation CD packaged with the iPod.
- Upload CD tracks onto the iPod. When the user inserts a disk, a playlist comes up along with the option to import the tracks. The computer will then prompt the user if he/she wants to import the tracks into iTunes. Click yes, which will add the compact disk’s tracks to the music library.
- Reiterate the above step for each CD being added to the iPod.
ITunes Music Store has an amazing selection of music. It costs $0.99 cents per track, while whole album usually cost about $9.90 USD. There are other programs (albeit illegal) that allow users to download music to iTunes such as Limewire and MyTunes Redux. When the iPod is connected to a computer via a USB cable, it automatically syncs with iTunes.
For downloading songs into iPod, one has to know about iTunes. When the iTunes software is opened, a multitude of options will appear. When the iTunes store is clicked, the user can view many songs and many more options like favorite television show, movie trailers, live concert recording, etc.
Choose anything from the list to download to one’s own iTunes library. The purchase price for this list varies from one topic to another. The store’s home page has the most popular free items and offers links to download them.
When download has been completed, either put it on the device directly or create a play list. A play list is a better option if the user has many downloaded items and wants to properly organize the downloaded items so that it is easier to search for music. Users can create their own play list with the help of the icons found at the bottom of the iTunes library screen.

When play list creation is complete or making the list of the things to be downloaded to the iPod, plug the device into the computer. Make sure that the iPod’s battery is fully charged. If it is not, then it might take a few minutes until the computer recognizes the iPod. When the iPod icon pops up on the library menu on the left hand side, start downloading the playlist and other downloads.
If the iPod is set to automatically sync with iTunes, it will begin to download everything purchased. However, to select what should be downloaded, click on the “Manage Music Manually” in the Summary Tab. Once clicked, the user will be able to choose what to put on the iPod and what to leave on iTunes for later downloads.
Do not detach the iPod from the computer until all desired music is downloaded. Once the download is complete, use the “Eject” function on the iTunes program and remove the iPod from the USB.
Tips & Warnings
- Set up the iPod on the computer it will be used on. An iPod set up with a Macintosh must have all the songs removed in order to use it on a Windows operating system. This only needs to be done once if users toggle between computers. To make it simpler, use the iPod on a single computer.
- The iPod should be detached from the computer correctly to avoid problems or loss. Always click the “Eject” button next to the iPod icon in iTunes or on the desktop’s lower right-hand corner. If the user quits iTunes on a Mac operating system, he/she drag the iPod icon on the desktop to the trash to eject. For a Windows operating system, right click the iPod icon on the desktop.
Additional Reading on How to Download Music to an iPod


Comments - 5 Responses to “How to Download Music to an iPod”
Sorry but comments are closed at this time.